Snowflake Gingerbread Cookies

DIFFICULTY RATING: MEDIUM

There's something about Christmas that makes me want to bake. I guess it's the cold weather outside, mixed with the fact that calories don't count in December (right?).

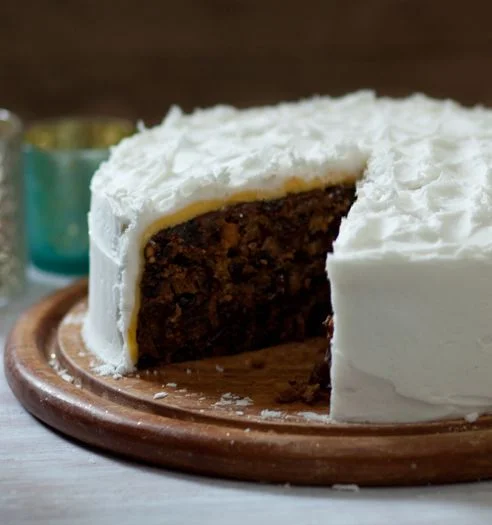
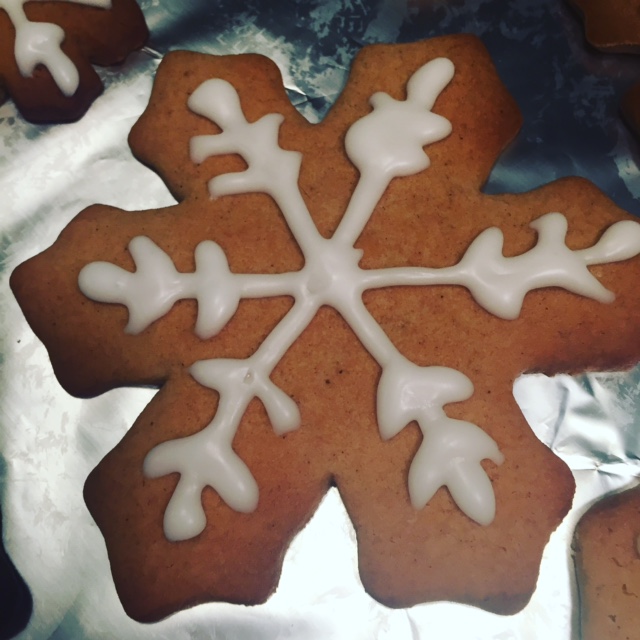
One Sunday morning, my sister S (the baker of the family) and I decided to put this Pinterest pin / recipe to the test, opting for golden syrup over molasses (because who has molasses to hand?!).

Scroll down for my top tips...

TOP TIPS

  • Golden syrup is a great alternative to molasses in this recipe
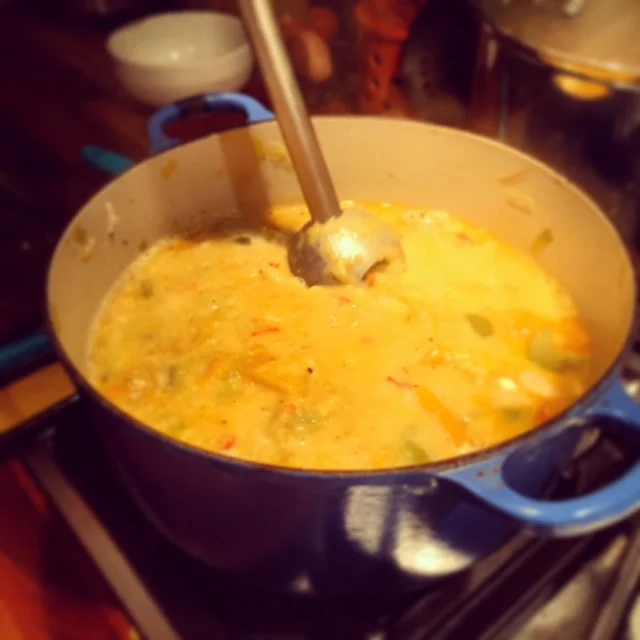
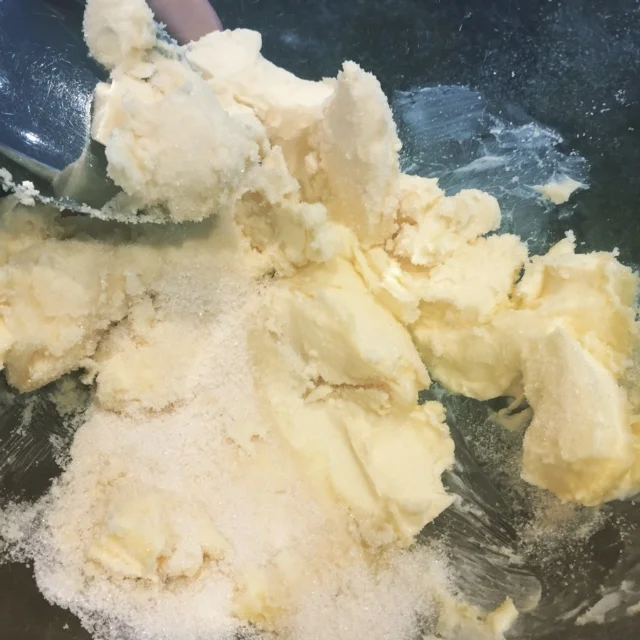
  • Much easier with an electric whisk! S and I had to play tag with the wooden spoon...
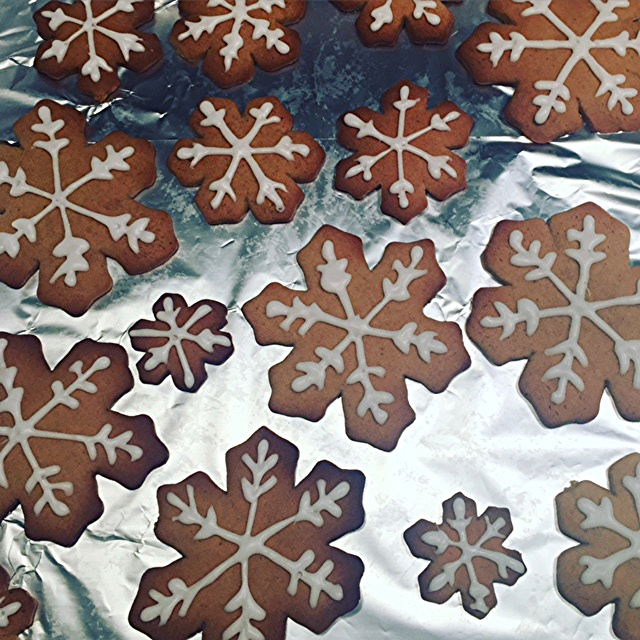
  • Difficulty rating is medium due to the absence of an electric whisk, plus the recipe quantities produce a lot of snowflakes - so it's tricky getting them all baked while finding enough cooling racks-!
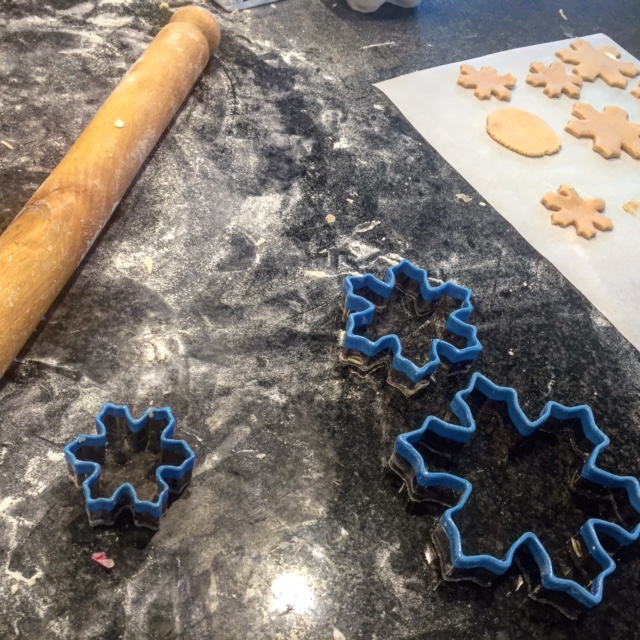
  • Make sure you stock up on baking paper and have a couple of cooling racks at the ready
  • Don't forget icing sugar for decoration (best applied with a piping bag)

Will you be baking this Christmas? See what I've been pinning to my Food board if you're in need of some inspiration!

Star Lights

DIFFICULTY RATING: EASY

Star curtain lights have been shooting across my Pinterest news feed in recent weeks, with many people opting to place them in their kitchen windows. I love this idea as it adds some sparkle while keeping essential kitchen surface space free for cooking, baking and entertaining.

Simply purchase a set of these and hook them to the back of a roman blind (if you don't have a blind, a lot of people buy these alongside their amazon purchase). And there you have it - a quick and simple way to add some festive lights to your home without breaking the bank.

TOP TIP

Make sure a plug socket is nearby before hanging!

For more affordable Christmas decor ideas, check out Festive Fruit.

Festive Fruit

For me, festive fragrances play a huge role in turning a home into a cosy Christmas grotto. So much activity happens during December that creates incredible aromas: Gingerbread in the oven, wood on the fire, Christmas tree pine needles, that sugary smell that emerges from a newly opened tin of Quality Streets... 

But until celebrations crank up a notch, a quick way to introduce some Christmas anticipation into your home without the sugary overkill is via festive fruits. A great transitional fragrance from autumn to winter, they are all over my Pinterest feed at the moment, in all scents and sizes.

Here are my favourites:

Cloved Oranges

Difficulty rating: Medium

Cloved oranges (traditionally known as pomanders) smell incredible. Not only that, but pop them in a bowl and you've got one good looking centre piece on your hands. 

Scroll down for my top tips...

TOP TIPS

  • I'll be honest, while they look easy, they're not! Cutting the zest deep enough to make an indent while trying to maintain a decent pattern is tricky.
  • Use a skewer to pierce the hole for your clove first as it'll make it easier to sit the clove in the pith.
  • Be VERY careful. These cloved oranges were created with a knife but I would have used the corner of a citrus zester if I had one. I definitely wouldn't recommend using a knife - way too dangerous, especially when you're working with a waxy round object.
  • For extra fragrance, roll your oranges in ground spices such as cinnamon, nutmeg, ginger, cardamom and (more!) cloves.

Dried Fruit

Difficulty rating: Easy

In the days before glass baubles and snow globes, people used dried fruit to decorate their homes and add a festive fragrance. Mama B recently purchased a food dehydrator to create her own fruit decorations and here's the result: 

It's incredible what you can do with them. Every year, my local shopping centre hosts a festive fruit stall. You can purchase wreaths...

Or a full-blown REINDEER!

Whether you make your own or purchase a wreath or two, definitely try this Pinterest trend out and let me know what you think. 

And for those who want to completely embrace the trend, I urge you to try Pret's orange spiced hot chocolate. It's like drinking Christmas (and isn't as pricey as Starbucks):

spiced-orange-hot-chocolate.JPG

Why not go all-out and make a fruit-filled Mary Berry Christmas cake? - Baking it will unleash the most incredible Christmas aroma to your home. 

Glitter Animals

Difficulty Rating: Easy (But Messy)

While on the hunt for some cake topper ideas for my Mary Berry Christmas cake, I stumbled across these glitzy animal toppers on Pinterest. Simply purchase a tube of these, apply PVA glue with a paint brush and sprinkle glitter over them! 

Scroll down for my top tips...

TIPS

  • Safety shout-out: While the glitter is non toxic, it's not for use by children under 3 years.
  • Beware - this is glitter we're dealing with. It goes everywhere! Make sure this DIY happens on a wipe-clean surface.
  • 3-4 will be joining these trees on top of my Christmas cake. I'll be making sure to brush any excess glitter off my icing before serving!
  • I'll be using the remaining herd as gift tag accessories and decorations on my dining room bookshelves to add some sparkle.
  • If you want to keep it more rustic, simply add glitter to specific parts of your animals e.g. antlers or hooves.
  • Toy manufacturer Safari Ltd offers many other themed animal Toobs from around the world. I went for North American wildlife as I really wanted a moose on my cake (the name of Mama & Papa B's new labrador) - as it's his first Christmas with us. Rainforest, coral reef, mythical - so many Toobs are available for different cakes and crafts! You can even get arctic animals (for an arctic roll or an icy-looking baked Alaska) - perfect for this time of year.

Keep an eye on Maison Bailey the week before Christmas to see these sparkly characters in action. For more festive cake topper ideas, check out my Christmas board on Pinterest.


In a Pickle

homemade-pickled-onions

Every Christmas, L and I pack up our bags and head to Sussex for a much needed relax and veg-out at my parents' home. Usually, we come armed with unusual beers from around the world, tubs of Twiglets and (last year's discovery) - pink port! This year, I wanted to contribute some homemade treats as an extra special thank you to Mama B.

With my Mary Berry Christmas cake sorted and steeping in brandy for the next few weeks, I turned to Pinterest for my next project. As you can imagine, there were millions of ideas on there! So I started thinking about Christmas at my parents, and what might be handy. Every Boxing Day, we put leftover turkey and ham on big sharing platters, turn leftover veg into Papa B's bubble & squeak, make some mashed potato and empty the fridge of pickles and condiments to add some zing.

With that in mind, I found this pickled onion recipe, popped on my apron and gave it a go.

(Scroll down for my top tips...)

pickling-onions
pickled-onions-jar
pickled-onions-gift-idea
drying-pickling-onions
how-to-make-pickled-onions-recipe.JPG

TOP TIPS

  • You must soak your onions in salt the night before you want to pickle them.
  • As you peel each onion, pop it into your jar so you get the right amount and don't waste any. (Make sure to sterilise your jar beforehand!)
  • Use a label maker to clearly mark what it is / when you made it. This will prove useful for your host and hostess giftees in case you don't get around to enjoying it together over Christmas. (Let's face it - so much food, so little time!)
  • Get creative and add some festive decoration to your jar via a bow and label. I love using my star punch to jazz up ordinary gift tags. Hobbycraft offer a great selection - I especially like this snowflake one for Christmas gifts. Glitter pens also add some sparkle but make sure to allow time for drying.

That's it! This Pinterest project was really easy to recreate and makes the perfect host & hostess gift at Christmas. Not only is it that extra bit of thoughtfulness and effort, but for me, pickled onions add that punch of flavour during a week-long food graze.

Will you try a homemade gift this Christmas? Join in the conversation over on Twitter.


Pumpkin Decorating Ideas

pumpkin-designs

Drilled Halloween pumpkins are all over my Pinterest news feed at the moment. More stylish than spooky, they create a really beautiful lantern effect as the light escapes through the miniature holes. Gold and cookie cutter designs are also becoming popular pins.

So I grabbed my drill, spray can and hammer and gave it a go:

DRILLED PUMPKINS

drilled-pumpkin
halloween-pumpkin-ideas
pumpkin-decorating-ideas
drilled-pumpkins

GOLD PUMPKINS

gold-pumpkins
gold-pumpkins
gold-pumpkin
spray-gold-pumpkin
pumpkin-gold
gold-spray-pumpkin
gold-pumpkin-decoration

COOKIE CUTTER PUMPKINS

carving-pumpkins
pumpkin-decorating
pumpkin-design-ideas
star-pumpkin
pumpkin-patterns
halloween-pumpkin-designs
pumpkin-carving-idea

TIPS

  • Avoid using real candles inside as they're more worry than they're worth - especially when it comes to flammable children's Halloween costumes. I opted for glow sticks - you get the same effect, they come in different colours and you can keep the lid of your lantern on for optimum glow.
  • When hammering the cookie cutter into your pumpkin, don't use a plastic-coated one (like I did!) as it will ruin it. An idea L had after I'd battered my cutter was to put a piece of wood over it, so you're hammering the wood instead. Pliers will help get your cutter out of the pumpkin.
  • Before spraying gold, ensure you place the pumpkin/s onto a bin liner. Not only will it protect the majority of the ground you're spraying onto, but it will help you transport them when they're drying - helping avoid fingerprints. 

Safety shout-out: Carving and drilling a round object can be dangerous and should be approached with caution. Ensure you use any type of spray in a well ventilated area, keep away from eyes etc - always read the label. Avoid using real candles inside your lanterns - if you'd prefer a tealight effect, there's some fab fake flickering ones out there.

PUMPKIN SEEDS

Don't let a great pumpkin go to waste. Wash and dry your pumpkin seeds before mixing them with olive oil and salt. Place one layer on a baking tray and roast for 10 minutes (or until golden). They make great snacks.

pumpkin-seeds
roasted-pumpkin-seeds

WARMING PUMPKIN SOUP

This Waitrose recipe arrived in the post the weekend I was experimenting with pumpkin designs - so I took it as a sign and gave it a whirl. 

It's a great way to use up old pumpkins post-Halloween (keep your seeds when you initially carve it out). Great for lunch, the best bit has to be the chilli kick at the end, which will keep you warm until dinner. 

pumpkin-soup
pumpkin-butternut-squash
roasted-pumpkin-butternut-squash
pumpkin-butternut-squash-soup
soup-recipe
make-pumpkin-soup
waitrose-pumpkin-soup
warming-pumpkin-soup

For more Halloween decor and recipe ideas, check out my Pinterest board dedicated to all things spooky. 

Mary Berry's Christmas Cake

Difficulty Rating: Easy

When I was younger - Christmas was all about the magic. Now, it's all about family and great food & drink. Every year, we spend most of our time in Mama Bailey's kitchen - watching the hob, bopping about to a festive playlist and drinking fizz. It's my favourite part of Christmas.

I've been wanting to make Christmas cake for a few years now but time has always got away with me (sound familiar?!) and before I know it, I've missed the window. (Christmas cake is all about making it up to 3 months in advance so the cake matures into that rich taste we love so much. It's like you're literally eating Christmas.) 

I decided this was the year - and found this Mary Berry recipe on Pinterest. 

WHY I LOVE CHRISTMAS CAKE

  • It combines alcohol with cake. Enough said.
  • The recipe is really simple to follow (thank you Mary!).
  • It makes a great Christmas centre-piece.
  • It's a great gift for whoever is hosting Christmas.
  • It keeps well.
  • When you bake it - it makes your house smell of Christmas. 
  • Fruit cake can be frozen for up to 1 year - so you can make it earlier and freeze if you wish.
  • You can still make Christmas cake as late as December - it just won't taste as rich.

Scroll down for timings, tips & the final result...

xmas-cake-ingredients
glace-cherries
IMG_6147.JPG
butter
sugar
IMG_6155.JPG
almonds
treacle
flour
xmas-cake-mix
xmas-cake
brandy-injections

HEADS UP: TIMINGS

  • It takes 3 days to soak the fruit in brandy (or sherry) so if you plan to bake on Saturday, get the fruit soaking on Wednesday. If you're a Sunday baker - get soaking Thursday. 
  • Then it takes 4-4.5 hours to bake so start this in the daytime rather than the evening otherwise it's a case of midnight bakery! (- Not that it happened to me... whoops.) 
  • Decorating: You don't add the covering to your cake until a week before you want to serve it - so you've got lots of time after you've baked to work out how you want to decorate it. (Scroll down for the final version...)

TIPS

  • Put a recurring annual reminder in your phone so you don't forget to make it in advance (no earlier than 25th September unless you bake & freeze). Also add reminders to stir your fruit when it's soaking in brandy/sherry over 3 days, as well as 'feeding' your cake with brandy/sherry at intervals over the 3 months to keep it moist (we do this via a flavour injector as well as brushing a glug over the surface). 
  • Add the ingredients to your online food delivery that week / month - it makes things so much easier. Otherwise you spend half your day trekking to the shops and having a panic because you can't locate treacle. 
  • If you don't have the correct cake tin, add this to your online shop (if you can). If not, this one is on Amazon Prime.
  • Also make sure you have greaseproof paper, foil, a flavour injector, pastry brush and an air-tight cake tin before you bake.
  • Don't wrap your cake directly in foil as it will react badly.
  • Use Pinterest for cake topper ideas. I'm loving the winter forest styles I've seen on there - I've got these so far:
  • Eat it before Christmas Day. By the 25th, everyone's full and food in general tends to merge into one. Make it an event - whether it's the first pudding you have when you've finished work for the year, or an accompaniment to a pot of tea on Christmas Eve. Eat it at a time you'll appreciate it.

Covering & decoration will be the week before Christmas (of course!). To see the finished version, make sure to follow Maison Bailey on Twitter & Instagram. I'll also update this post with the final result!

UPDATE 22.12.15:

Ta da!

TIPS

  • Beware - Mary advises to wait 'a few days' between adding the marzipan layer so it has time to dry out before applying the royal icing. I didn't clock this so could only leave it for 24 hours. 
  • If you're new to icing, go for the 'rustic' look by adding peaks to the top with a palette knife. Less pressure to achieve a silky smooth finish (plus I think it looks more inviting).
  • Try these glitter animals as cake toppers (N.B. don't eat the glitter - it's not for consumption!).
  • If you don't have a cake stand with a lid, I'd definitely get one before decorating (I have this one). Not only will it protect the cake during these final stages, but it'll help with transportation if it's a gift for the Christmas host.

If fruit cake's not to your taste, why not try these snowflake gingerbread cookies - they taste really Christmassy, too.

Pinterest Pinboard

A DIY pinboard is one of the best ways to make your home feel like 'you'. From the cover fabric (floral, map, wildlife, pattern, colour, etc) to what you put on it - it's a shop window that represents your style, and the things you treasure.

diy-pinboard

Difficulty rating: Easy

I find the best deals for fabric and DIY essentials are online. Order in the week ready to get crafty at the weekend. 

What you need:  

Fabric, pinboard, wadding, ribbon, staple gun/staples, drawing pins

How to make one:

  1. Simply stuff wadding between your fabric and the pinboard
  2. Leave enough fabric to staple-gun to the back of the board
  3. Attach strips of ribbon via the same method
  4. Fix the meeting points of ribbons with a drawing pin (I went for white to blend in with my white ribbon. Go for long drawing pins so they go through the wadding and pin into the board)

That's it! - So simple.

What to Pin?

We chose to put our pinboard up in our living room on a wall we regularly walk past. This helps us get the most out of it - we place reminders, things that make us smile, plus things we think just look pretty and go with the room. Keep it personal to you and you can't go wrong.

pinboard-ideas

For more pinboard ideas, see what I've been pinning on Pinterest.