Pinterest projects

Space-Themed Baby Mobile

DIFFICULTY RATING: MEDIUM

There are some lovely baby mobiles on the market, but a lot are super expensive. L suggested Mama B and I use some of my maternity leave to make Baby L's nursery mobile. I was apprehensive at first as my sewing skills leave a lot to be desired-! But Mama B sewed a lot at school and has never forgotten the essentials, plus her career was in teaching, so she taught me in a very easy-to-understand way (making the whole project much more enjoyable!).

I also found the process very therapeutic. I have one of those minds that tends to wander off during TV watching - especially with so much baby stuff flying around my head these days! Opening up my sewing kit and stitching in front of the telly really relaxed me. It was also a nice project to enjoy making with my mum - something we can give to Baby L and keep in the family.

We copied the design of this pretty version below from Etsy, which I found on Pinterest:

ORIGINAL PIN:

Via

OUR ATTEMPT:

SHOPPING LIST

  • Felt (enough for the amount you want to make - remember you need double as you're stitching two pieces together)
  • Embroidery thread (we used some in similar colours to the felt, others slightly brighter to stand out)
  • Needle
  • Polyester filling
  • Wooden skewer (it'll make sense in a minute)
  • Circular embroidery frame
  • Transparent decor crafting thread
  • Ribbon
  • Fabric glue
  • Fabric scissors
  • Pins
  • Printer / paper / card
  • Pritt stick
  • Sequins if you want to add extra sparkle.

HOW-TO

  • Start by printing out your templates, ensuring their sizing is similar. We made the moon slightly bigger as it's the centre feature. We used Google image search for our templates.
baby-mobile-templates.JPG
  • Cut out your first template and stick it to card. Cut out and you have your first template. (Make sure any sharp edges are rounded rather than pointed otherwise it proves tricky when trying to stitch.)
  • Fold over a square of felt and pin the template to it.
  • Cut around template with fabric scissors.
  • Remove template and start blanket stitching around the edge. Rather than attempting to describe this method, I'd recommend taking a look at some YouTube videos - this one was particularly helpful:

(Video tutorial via)

  • Stuff your felt with polyester filling as you finish a section. Make sure you put enough in there to pad the shape out. We used the blunt end of a wooden cooking skewer to reach the more narrow parts.
  • Once you're happy with the stuffing, close off your stitch.
  • Once all shapes are complete, sew your transparent decor crafting thread to your shapes and fix to the hoop, ensuring everything is balanced and secure. We tied ribbon around the hoop as this allowed us to sew the thread to the ribbon so it was extra secure.
  • Hang your hoop via bright ribbon.
  • And, you're done!

TOP TIPS

  • Make sure everything is fitted securely and is 100% baby-safe
  • Practice casting off, blanket stitching and finishing stitches on a spare bit of felt beforehand
  • Stuff a good amount of polyester filling to give each piece shape, but don't stuff too hard with the skewer as you can damage the stitches
  • We wrapped yellow ribbon around the hoop, which not only added extra colour but allowed us to sew the transparent thread to the hoop, making it extra secure
  • Find a hook to hang your mobile while you attach each piece, so you can see how each piece fits and balances together before securing
  • We stitched a star underneath the centre moon to fill a gap, which worked really well
  • Keep an eye on the two sections of felt you're stitching as you go, to ensure they're aligned
  • The embroidery thread we had was made up of 6 strands, so we separated it into three to make sewing easier and the stitches less bulky
  • We used fabric glue to attach the green felt to the Earth design - make sure this is completely secure
  • We added sequins to Saturn to break up the yellow and add a bit of space sparkle
  • Only sew when you have time - you can really tell when sewing has been rushed (this makes a great maternity leave, evening or weekend project)
  • Bolder colours are better for your baby's development (apparently!) so have fun with the colour scheme! High contrast black and white is also beneficial for babies' visual development, according to experts.

VERDICT

The sewing itself is really fun, especially when you get more confident. However, sewing the transparent thread to the hoop at the end is the tricky / fiddly part. Don't do this when you're in a rush - it requires time, patience and another person's set of eyes who can direct the sewer in terms of how high / low each piece falls and where on the hoop each fits.

For more nursery decor ideas, take a look at my Nursery board on Pinterest.

YOU MIGHT ALSO LIKE...

Melted Crayon Pumpkins

You may remember last year, I had a lot of fun drilling and carving pumpkins. This year, I decided to use Pinterest again for some more pumpkinspiration and came across these melted crayon versions...

DIFFICULTY RATING: MEDIUM

ORIGINAL PIN:

Via

MY ATTEMPT:

After following the how-to, I have to say - it's not as easy as it looks! (As you can probably tell...!) In a nutshell, you glue crayons to the top of your pumpkin and put a hairdryer over them so they melt and drip down. In reality, the glue doesn't really hold the crayons in place and when you heat it up, it obviously melts the glue! I had my hairdryer on the hottest temperature on the lowest fan and it just wasn't working. I had to hold the hairdryer really close to the crayon and even when it started to melt, it was being blown everywhere! 

In the end, we (L had to give me a hand!) decided to play hardball and grabbed a kitchen blowtorch. This obviously makes the craft more dangerous and not appropriate for children, but it did one hell of a job of melting the crayons quickly and preventing too much mess-!

Initial tools - before replacing the hairdryer with a kitchen blowtorch and popping some foil on the stalk to prevent burning.

Initial tools - before replacing the hairdryer with a kitchen blowtorch and popping some foil on the stalk to prevent burning.

Soak crayons to remove paper sleeves (much easier to peel off this way!).

Soak crayons to remove paper sleeves (much easier to peel off this way!).

Place crayons on kitchen roll to dry off.

Place crayons on kitchen roll to dry off.

Snap crayons in half as you don't need a whole crayon for melting.

Snap crayons in half as you don't need a whole crayon for melting.

Add PVA glue to the top of the pumpkin.

Add PVA glue to the top of the pumpkin.

Place crayons on top. Leave the glue to set a bit if you can.

Place crayons on top. Leave the glue to set a bit if you can.

You have to laugh: This is what happened when I used a hairdryer. It went EVERYWHERE and wasn't giving the drip effect I was after.

You have to laugh: This is what happened when I used a hairdryer. It went EVERYWHERE and wasn't giving the drip effect I was after.

Attempt two: We replaced the hairdryer with a kitchen blowtorch and covered the stalk with foil to avoid burning.

Attempt two: We replaced the hairdryer with a kitchen blowtorch and covered the stalk with foil to avoid burning.

MUCH more effective! (But also more dangerous as you're dealing with a naked flame).

MUCH more effective! (But also more dangerous as you're dealing with a naked flame).

As you can see, a VERY messy craft so cover all surfaces! 

As you can see, a VERY messy craft so cover all surfaces! 

THE END RESULT:

Not the prettiest but I like this crafty look - fun, messy and a great way to jazz up plain pumpkins.

Not the prettiest but I like this crafty look - fun, messy and a great way to jazz up plain pumpkins.

Place on a coaster to avoid staining your furniture.

Place on a coaster to avoid staining your furniture.

I added mine to each side of our fireplace to balance it out.

I added mine to each side of our fireplace to balance it out.

TOP TIPS

  • Use a kitchen blowtorch. Otherwise it takes ages, isn't very effective and melted crayon gets blown everywhere
  • Definitely NOT a child-friendly craft as a result
  • I wouldn't place paper under your pumpkins are you're using a naked flame with the kitchen blowtorch. The ones in the picture were there when we were using a hairdryer
  • Cover your pumpkin stalk with some foil to avoid burning
  • Don't melt the crayons too much otherwise you start to burn the pumpkin beneath
  • Much easier when there's two of you but you have got to be SO careful when tilting the pumpkin to get the drips as you're dealing with an extremely hot open flame
  • Ghost pumpkins with oranges, reds and yellows look particularly autumnal
  • Always keep out the way of children and pets as the dried crayons can peel or break off (why I put them up high on our fireplace)
  • Don't place pumpkins directly on furniture as they can stain it (I used candle coasters underneath mine).

VERDICT

This is a pretty dangerous Pinterest project - because of our use of the kitchen blowtorch. But if you're careful and smart with the process, the end result looks really good! (Well, not exactly as it does on Pinterest but I love the colour and texture it adds to the pumpkins / your Halloween home decor.) It's definitely something a bit different to the popular carved and drilled ones you see on Pinterest these days. If I were to do it again, I'd probably buy more black and orange crayons to give them a more eerie look.

I'd say this Pinterest project was achievable but don't be fooled by how perfect they come across in your Pinterest feed. I think the messier the better.

Discover more of my favourite Halloween craft ideas via my board on Pinterest.

YOU MIGHT ALSO LIKE...

Autumn To-Do List

Windows are closed, candles are on, blankets are out: cosy autumn has arrived! I'm a winter baby so love this seasonal transition into colder temperatures. To ensure this vibrant season doesn't pass me by too quickly, I've put together an autumn to-do list, which I'll be working my way through in between work and baby prepping.

Pinterest, as always, is a great inspiration for autumnal activities, decor and crafts. Take a look at my Halloween and Bonfire Night boards for some quick home ideas that really make the most of these seasonal events. 

Onto my top 10 to-dos this season:

1. Make Crumbles

I love these classic British puds because they use up any fruit that's starting to turn (or if you're harvesting the last innings of your garden / allotment). It requires only a few staples - simply purchase these and you'll always have an instant pudding at hand should you need it:

  • Golden caster sugar
  • Self-raising flour
  • Butter
  • Light brown muscovado sugar

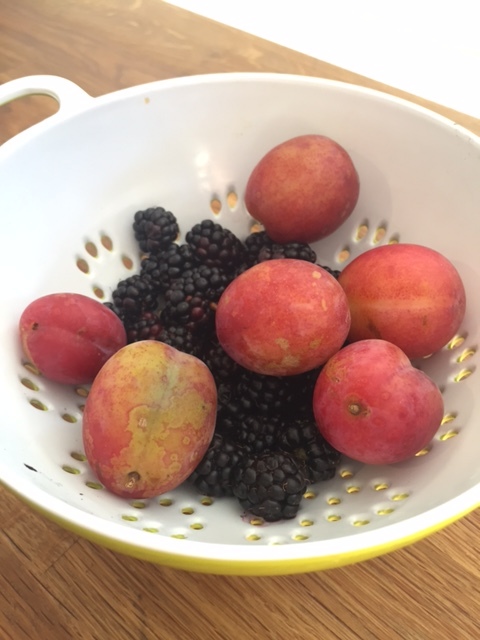
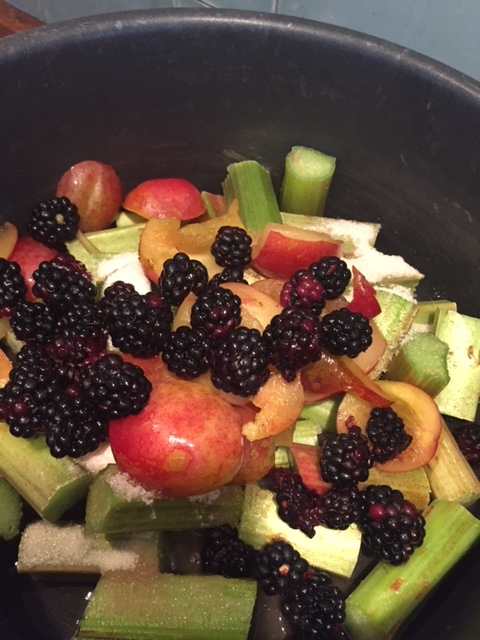
My go-to recipe is this one - although I add in whatever fruit I have at the time. For example, the photos below followed a harvesting session at our allotment. This rhubarb, plum & blackberry crumble was a real winner. I didn't bother with the port or walnut in the recipe but I'm sure they'd make nice additions.
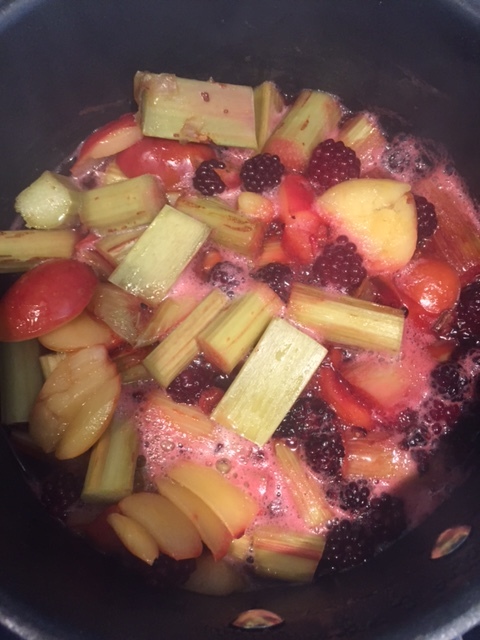
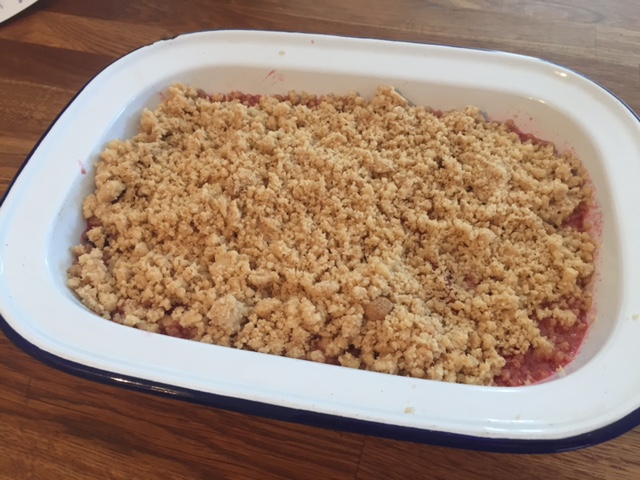
2. Buy a Fresh Batch of Slipper Socks

Nothing better than putting your feet into a new fluffy pair after a hard day.

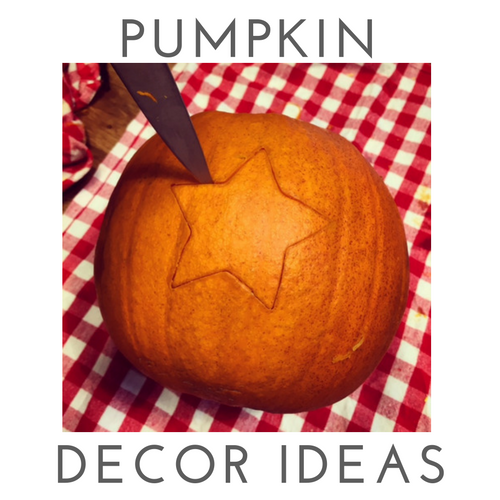
3. Get Creative with Pumpkins

You might remember I had a LOT of fun last year getting crafty with pumpkins - I will be doing the same this year but maybe trialling some new trends.

4. Halloween Night In

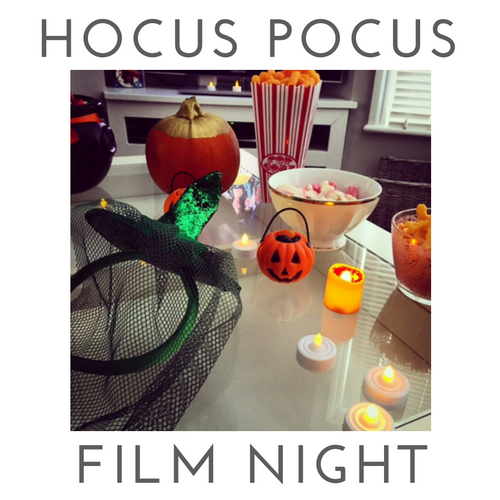
With Baby L on the way, we're planning a cosy night in with one of our favourite retro movies: Hocus Pocus! But just because we're not dressing up (and drinking!) like we usually do this time of year, it doesn't mean we can't go all out with sweets and decorations. Take a look at my Hocus Pocus-themed party ideas

5. Leafy Walks

Sitting down for long periods of time isn't the most comfortable of experiences now I'm into my third trimester. Some easy strolls around our local park are a great way to get some exercise while taking in the changing colours.

6. Make Soup

Because that's what autumn's about, right? Why not use your leftover pumpkin from any carving crafts and turn it into this (seriously tasty) warming pumpkin soup.

7. Early Bird Christmas Shopping

Two reasons here: 1) Baby L is arriving early December so I don't anticipate having much time (or energy!) that month-! 2) It helps spread out the cost of gift buying by starting some shopping now with my September salary.

This is on my stocking list this year.

This is on my stocking list this year.

8. Pumpkin Spice Latte

The only time I really go to Starbucks is during the autumn and winter for their seasonal coffees. This one's my particular favourite.

9. Dog Shopping

Is it me or are there suddenly loads more dog walkers about? Ok - so I walk home via a park so that's a given, but there's definitely more of them, I swear! Maybe it's because everyone's back from summer holidays and into the swing of their routines again? Either way, L and I have been enjoying seeing dogs of all shapes and sizes (from a pack of dachshunds to his & hers dalmatians!) as they enjoy their walks in this new brisk air. So much so, we're considering a canine addition to Maison Bailey. We've decided to see how baby goes first-! But that doesn't mean we can't start window shopping... we're currently loving cocker spaniels.

Via

10. Couple Time

Any parent friends/family all tell us to treasure this time just the two of us. Your world changes when you suddenly have a new addition to consider. We're so excited but completely get their point. Which is why we've booked an early shopping Christmas trip away to Guildford in October, followed by spa treatments. I absolutely can't WAIT.

Via

Do you have any autumnal traditions? Or crafts you're planning to try this year? I'd love to hear about them in the comments below!

YOU MIGHT ALSO LIKE...