Decor Ideas for Book Lovers

Over the last few months, J has discovered the magical world of books. What used to be just another chew toy has suddenly become a daily essential to enjoy in the morning, on-the-go and before bed. Picture books are his current favourite, especially if they’re lift-the-flap ones and definitely if they involve Peppa Pig.

The Book People recently got in touch and treated J to some new books for his collection. He was in his element! A whole new set of Peppa Pig stories, a new lift-the-flap Spot book, some books ready for spring, stories to inspire his imagination and some picture/word books to help with his speaking:

teepee-books.JPG

This got me thinking about home decor and the amount of amazing ideas I see online (mostly on Pinterest and Instagram). From how to store your favourite stories to how to give a nod to your favourite novel. Here are some of my favourite ideas that I've used in my home:

Frame Cards

Head to the card section of most bookshops / websites and you’ll likely be spoilt for choice with cards that feature your favourite characters. From Roobarb & Custard to Pride & Prejudice, it’s a quick way to create art that means something to you. (If you buy IKEA frames then it’s also a really affordable way to personalise art in your home – have a look at my Easy Art post.)

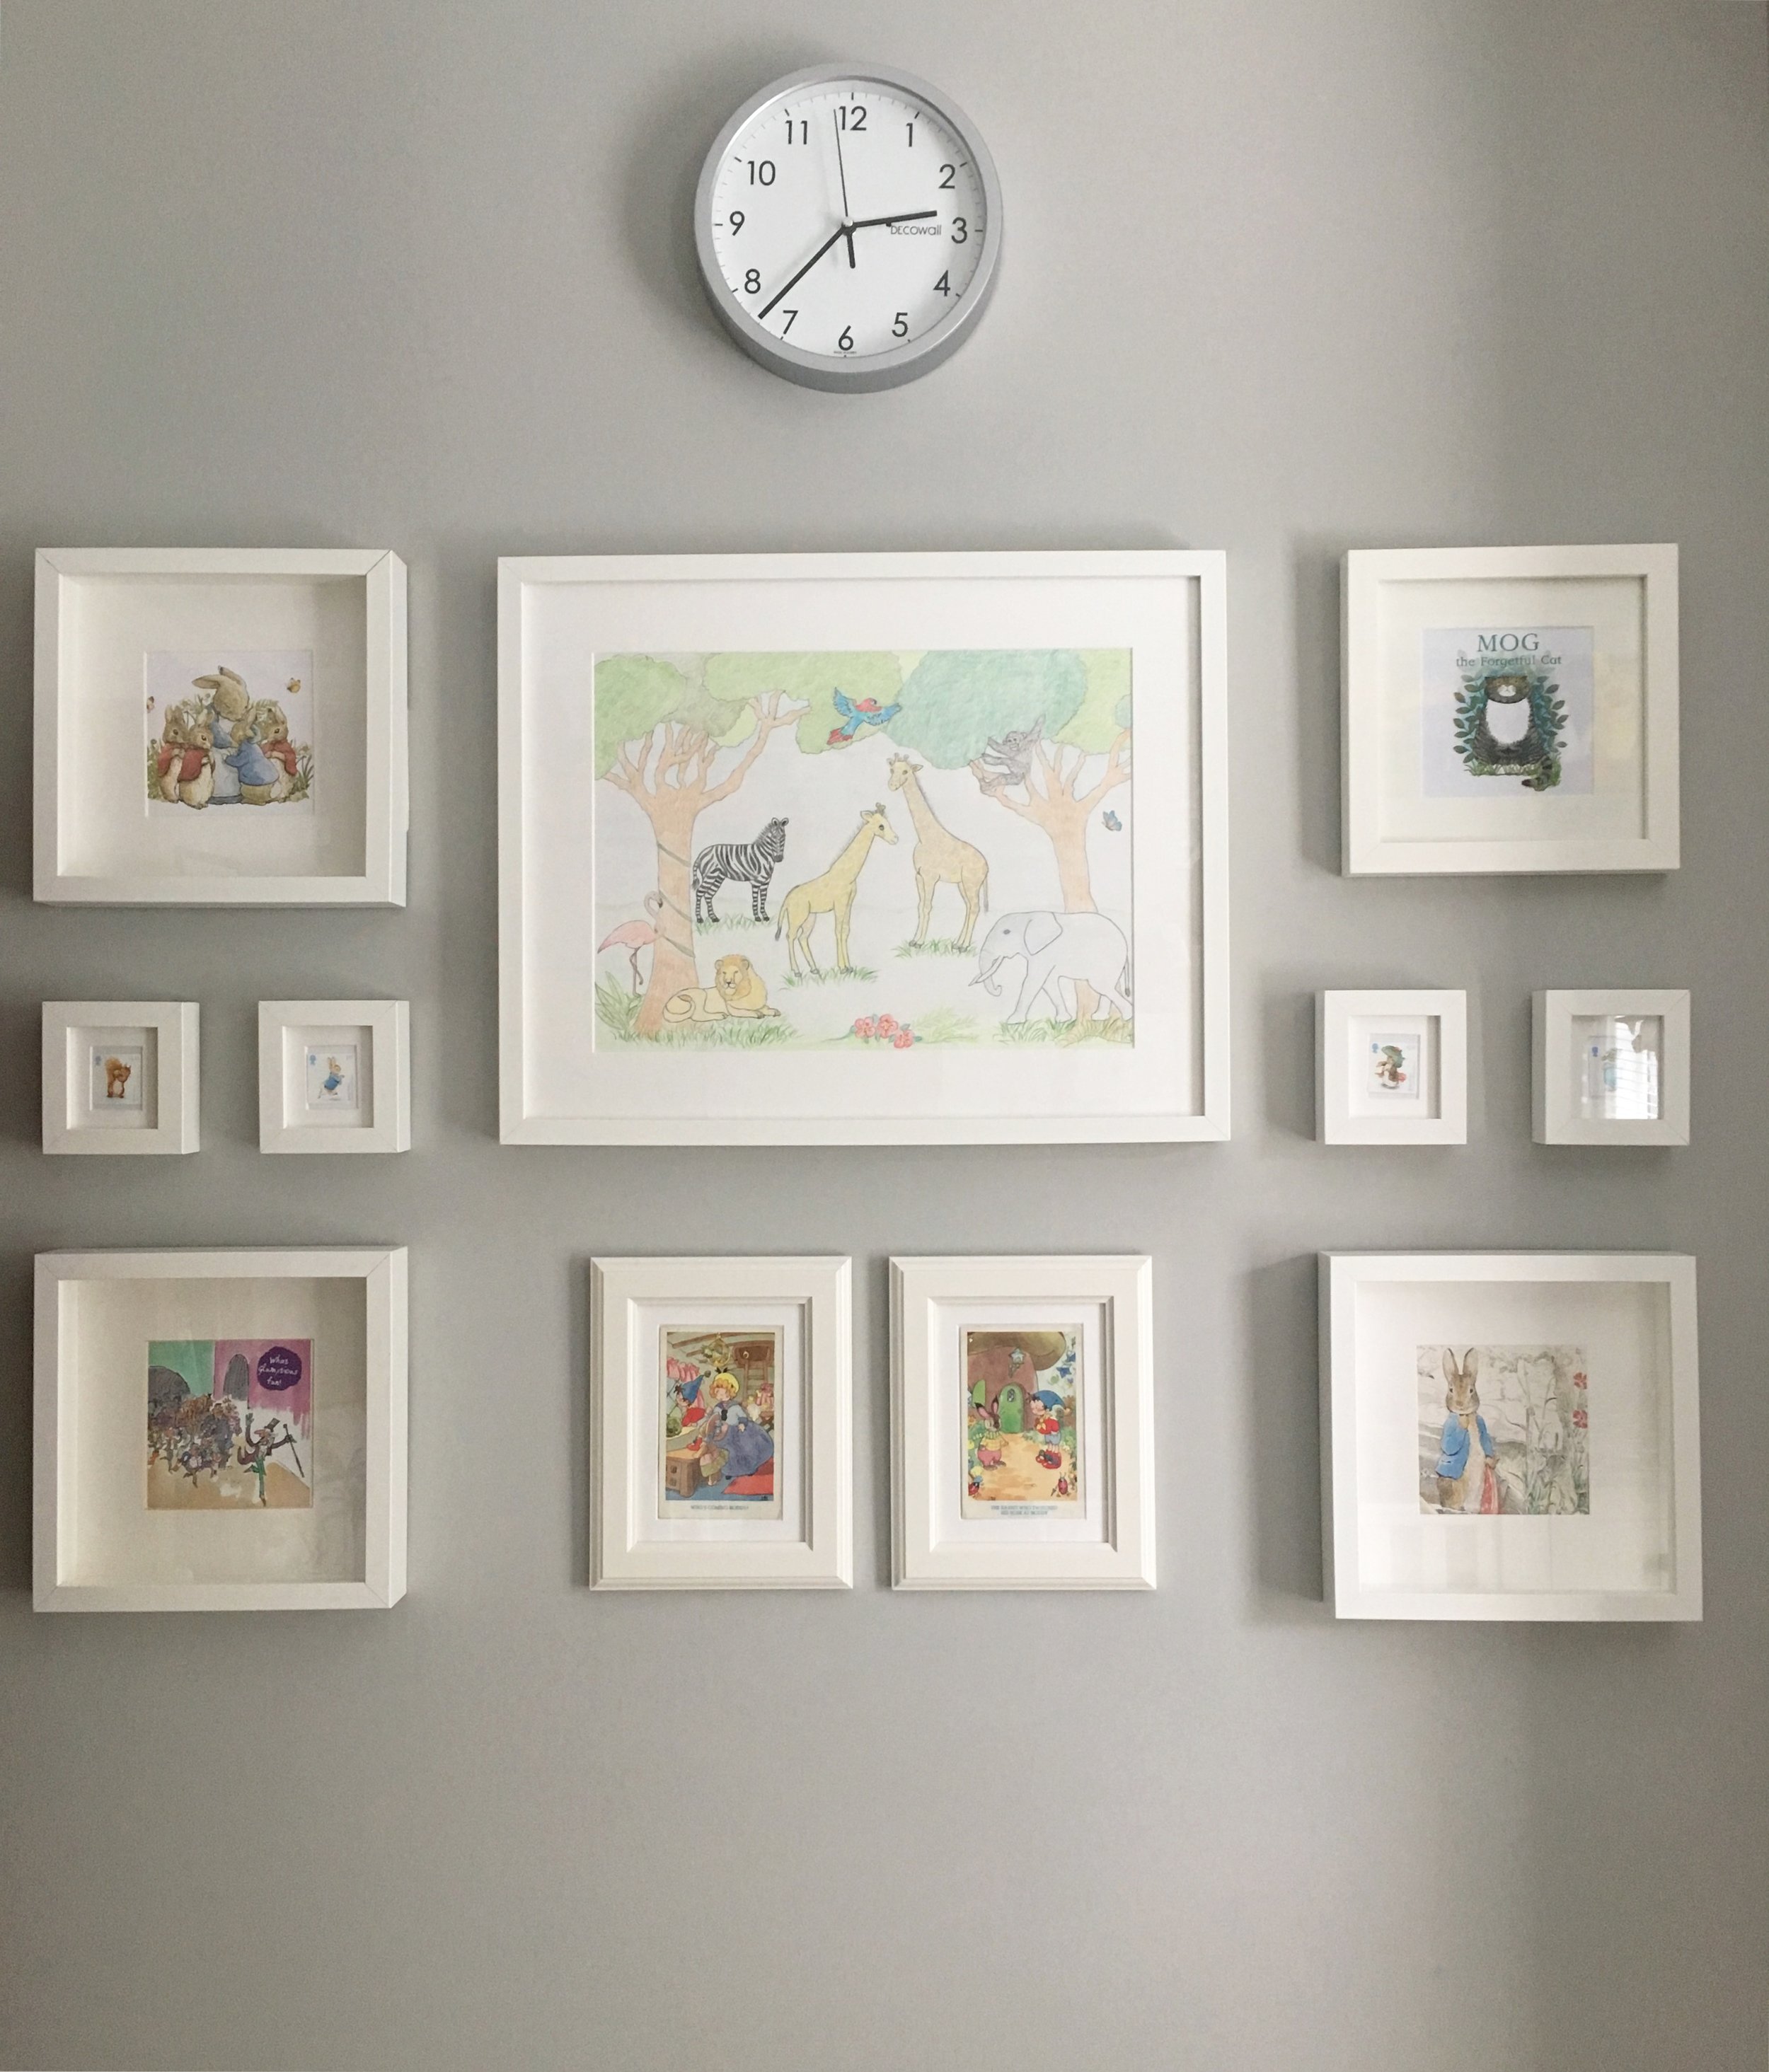
I made J a gallery wall in his nursery with famous characters including Noddy, Mog the Forgetful Cat, Beatrix Potter characters and a Charlie & The Chocolate Factory illustration. I think it’s a great way to get him into reading from a young age – by making the characters part of his room.

gallery-wall.JPG

Posters & Prints

The Literary Gift Company offer an entire novel in poster format so you can read a bit here and there! You can also find their lovely products on Not on the High Street – I have the Alice in Wonderland print in our bathroom. Speaking of NOTHS – simply search a classic book and you’ll likely see a number of pretty posters, prints, cushions, etc to display in your home.

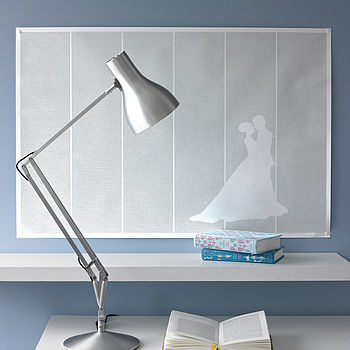
(Clockwise from left: Alice In Wonderland, The Wizard of Oz, Huckleberry Finn, Pride & Prejudice. Images via The Literary Gift Company / Not On The High Street)

Etsy is also great if you know what you’re looking for. I knew I wanted some sort of nod to Harry Potter in our home (we both love the books and films) so after a quick search on the site, I came across this print, which is now hanging in our downstairs WC.

A bestie also treated me to an illustration from a vintage Alice in Wonderland book, which I had framed. It’s my favourite book so it was the perfect gift:

alice-print.JPG

Pretty Books 

Books themselves can make beautiful decor pieces – I particularly love books that add a pop of colour, like these Puffin Classics in my nephew N’s nursery. (I also love his Beatrix Potter music and money boxes – pure classics.)

puffin-classics.JPG

Characters

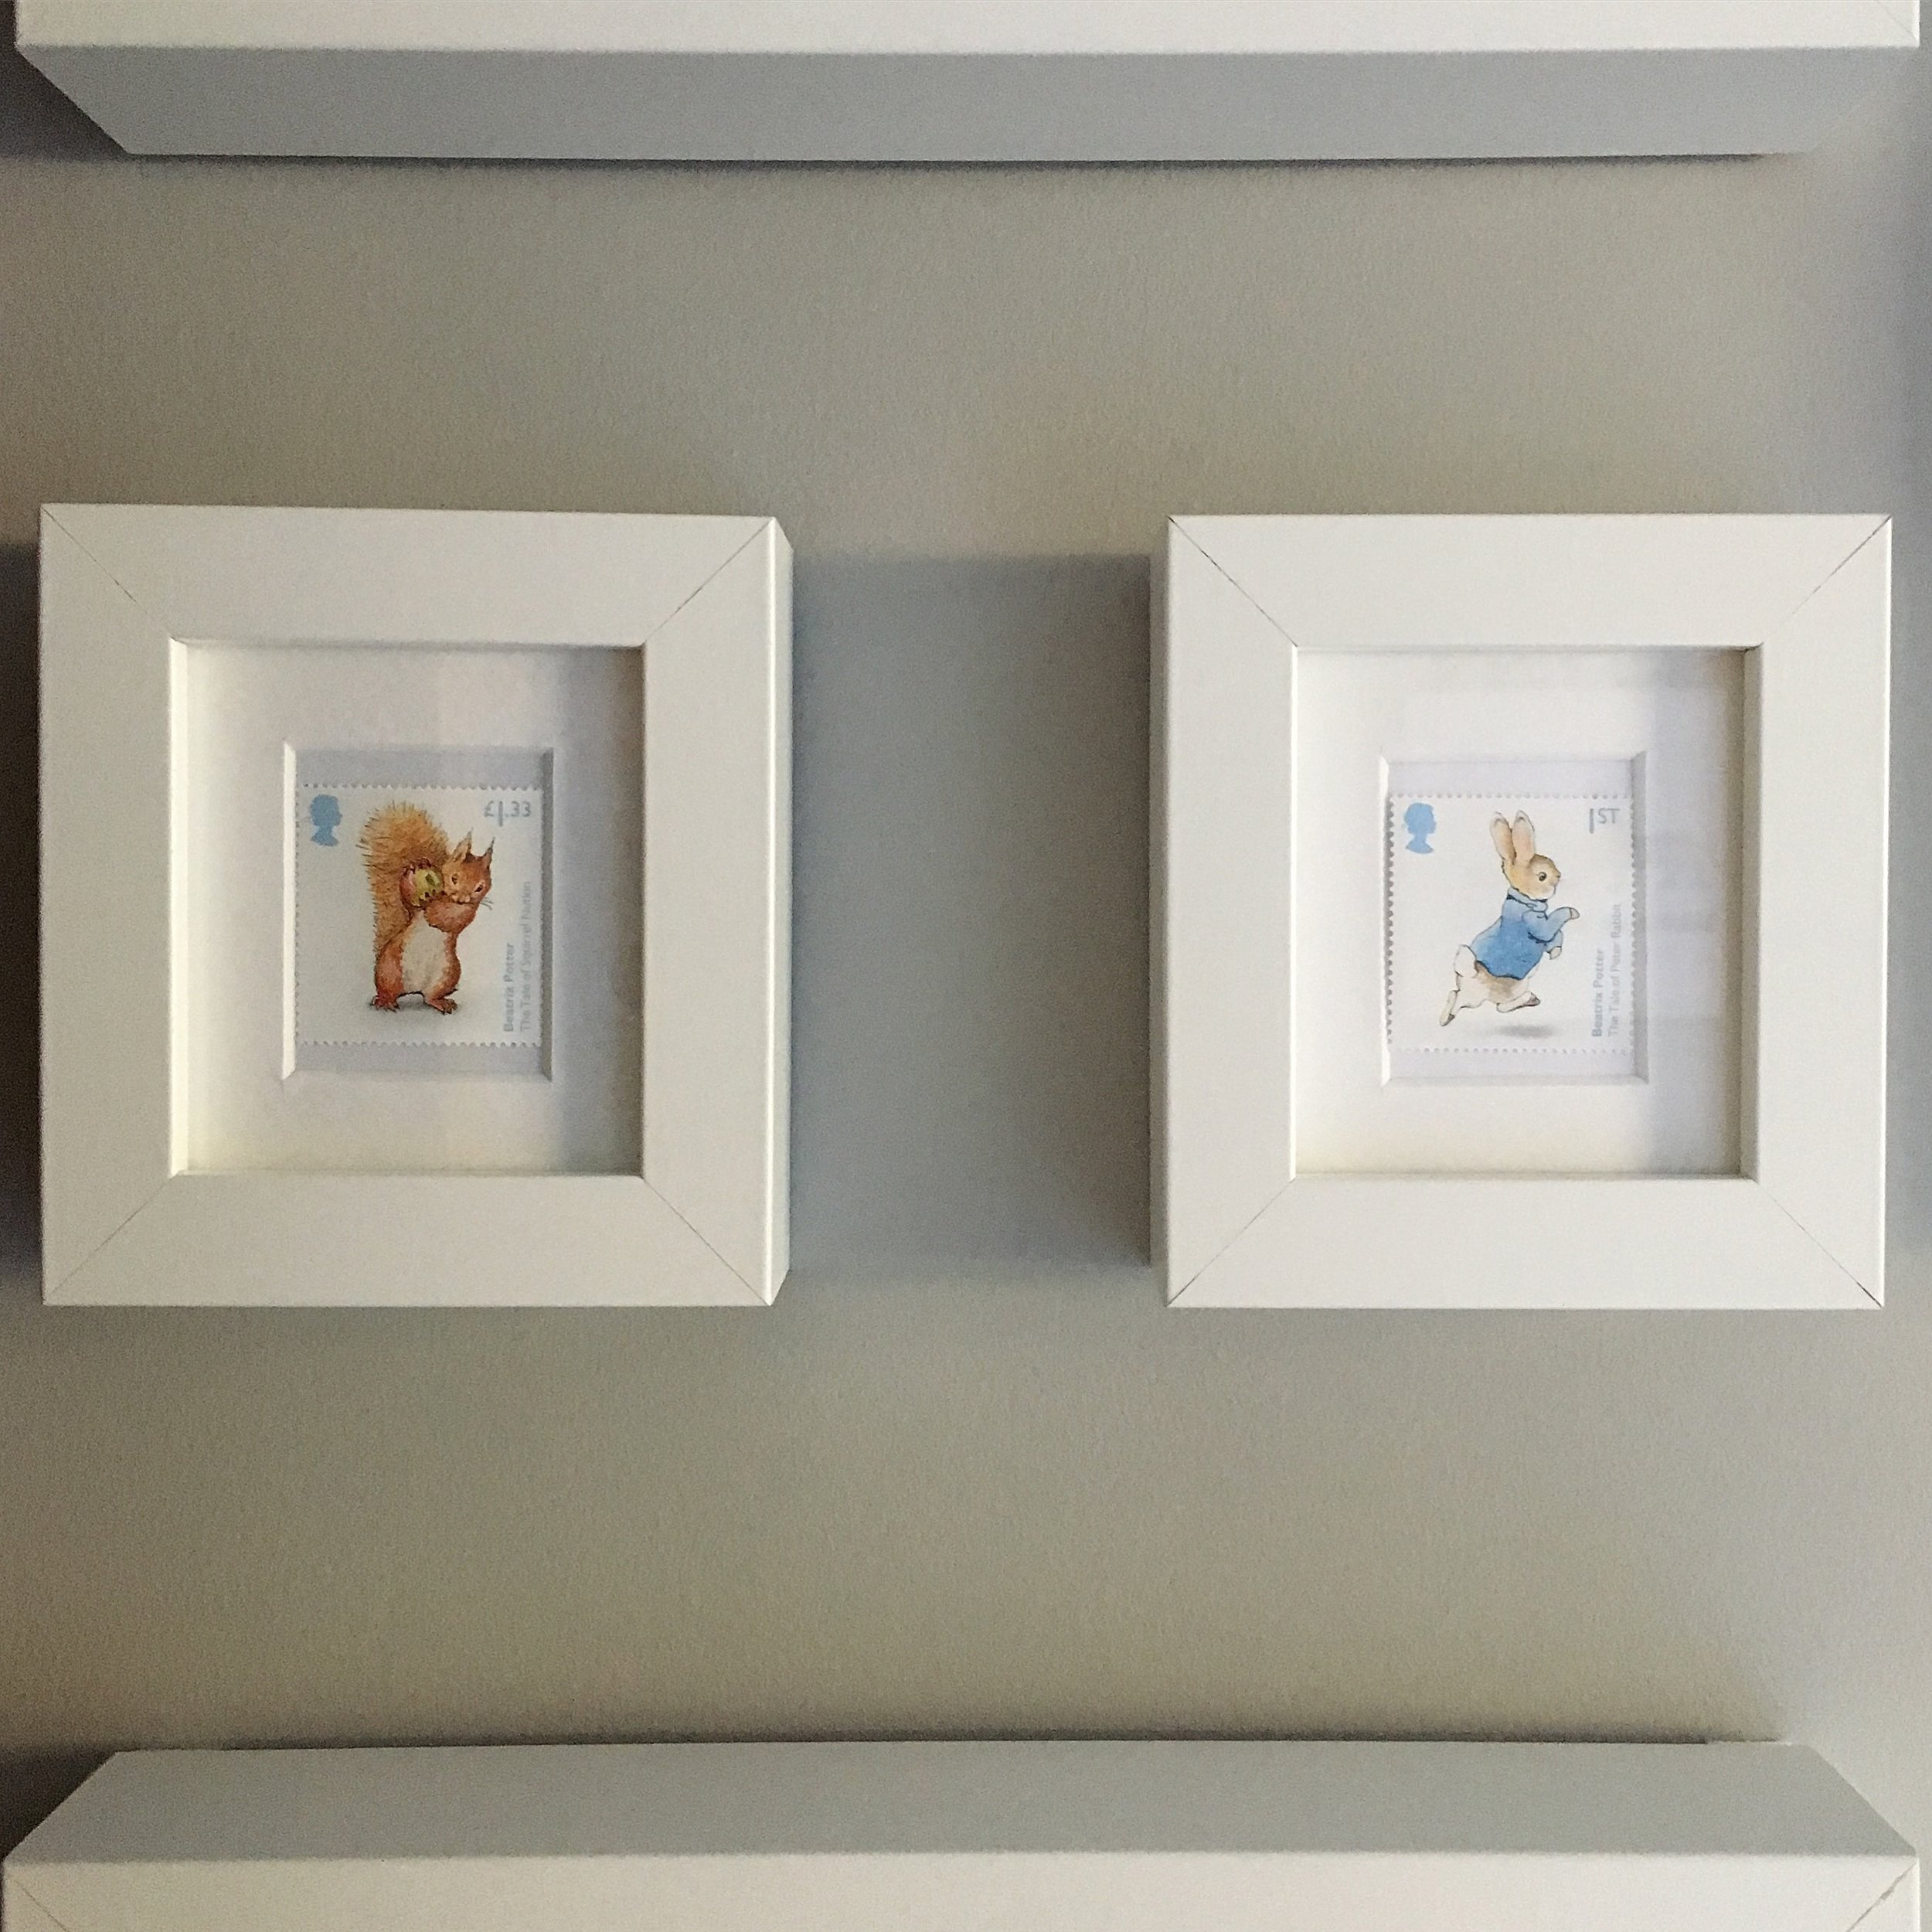
There are so many memorable characters in literature, especially from children’s books. Other than books and prints, there are lots of other ways to feature them in your home. For example, Royal Mail released a collection of Beatrix Potter stamps to commemorate 150 years since the author's birth. I ordered two sets and put them in IKEA frames for J & N. An easy way to create nursery art, plus it’s something valuable they can keep for the future:

stamps.JPG

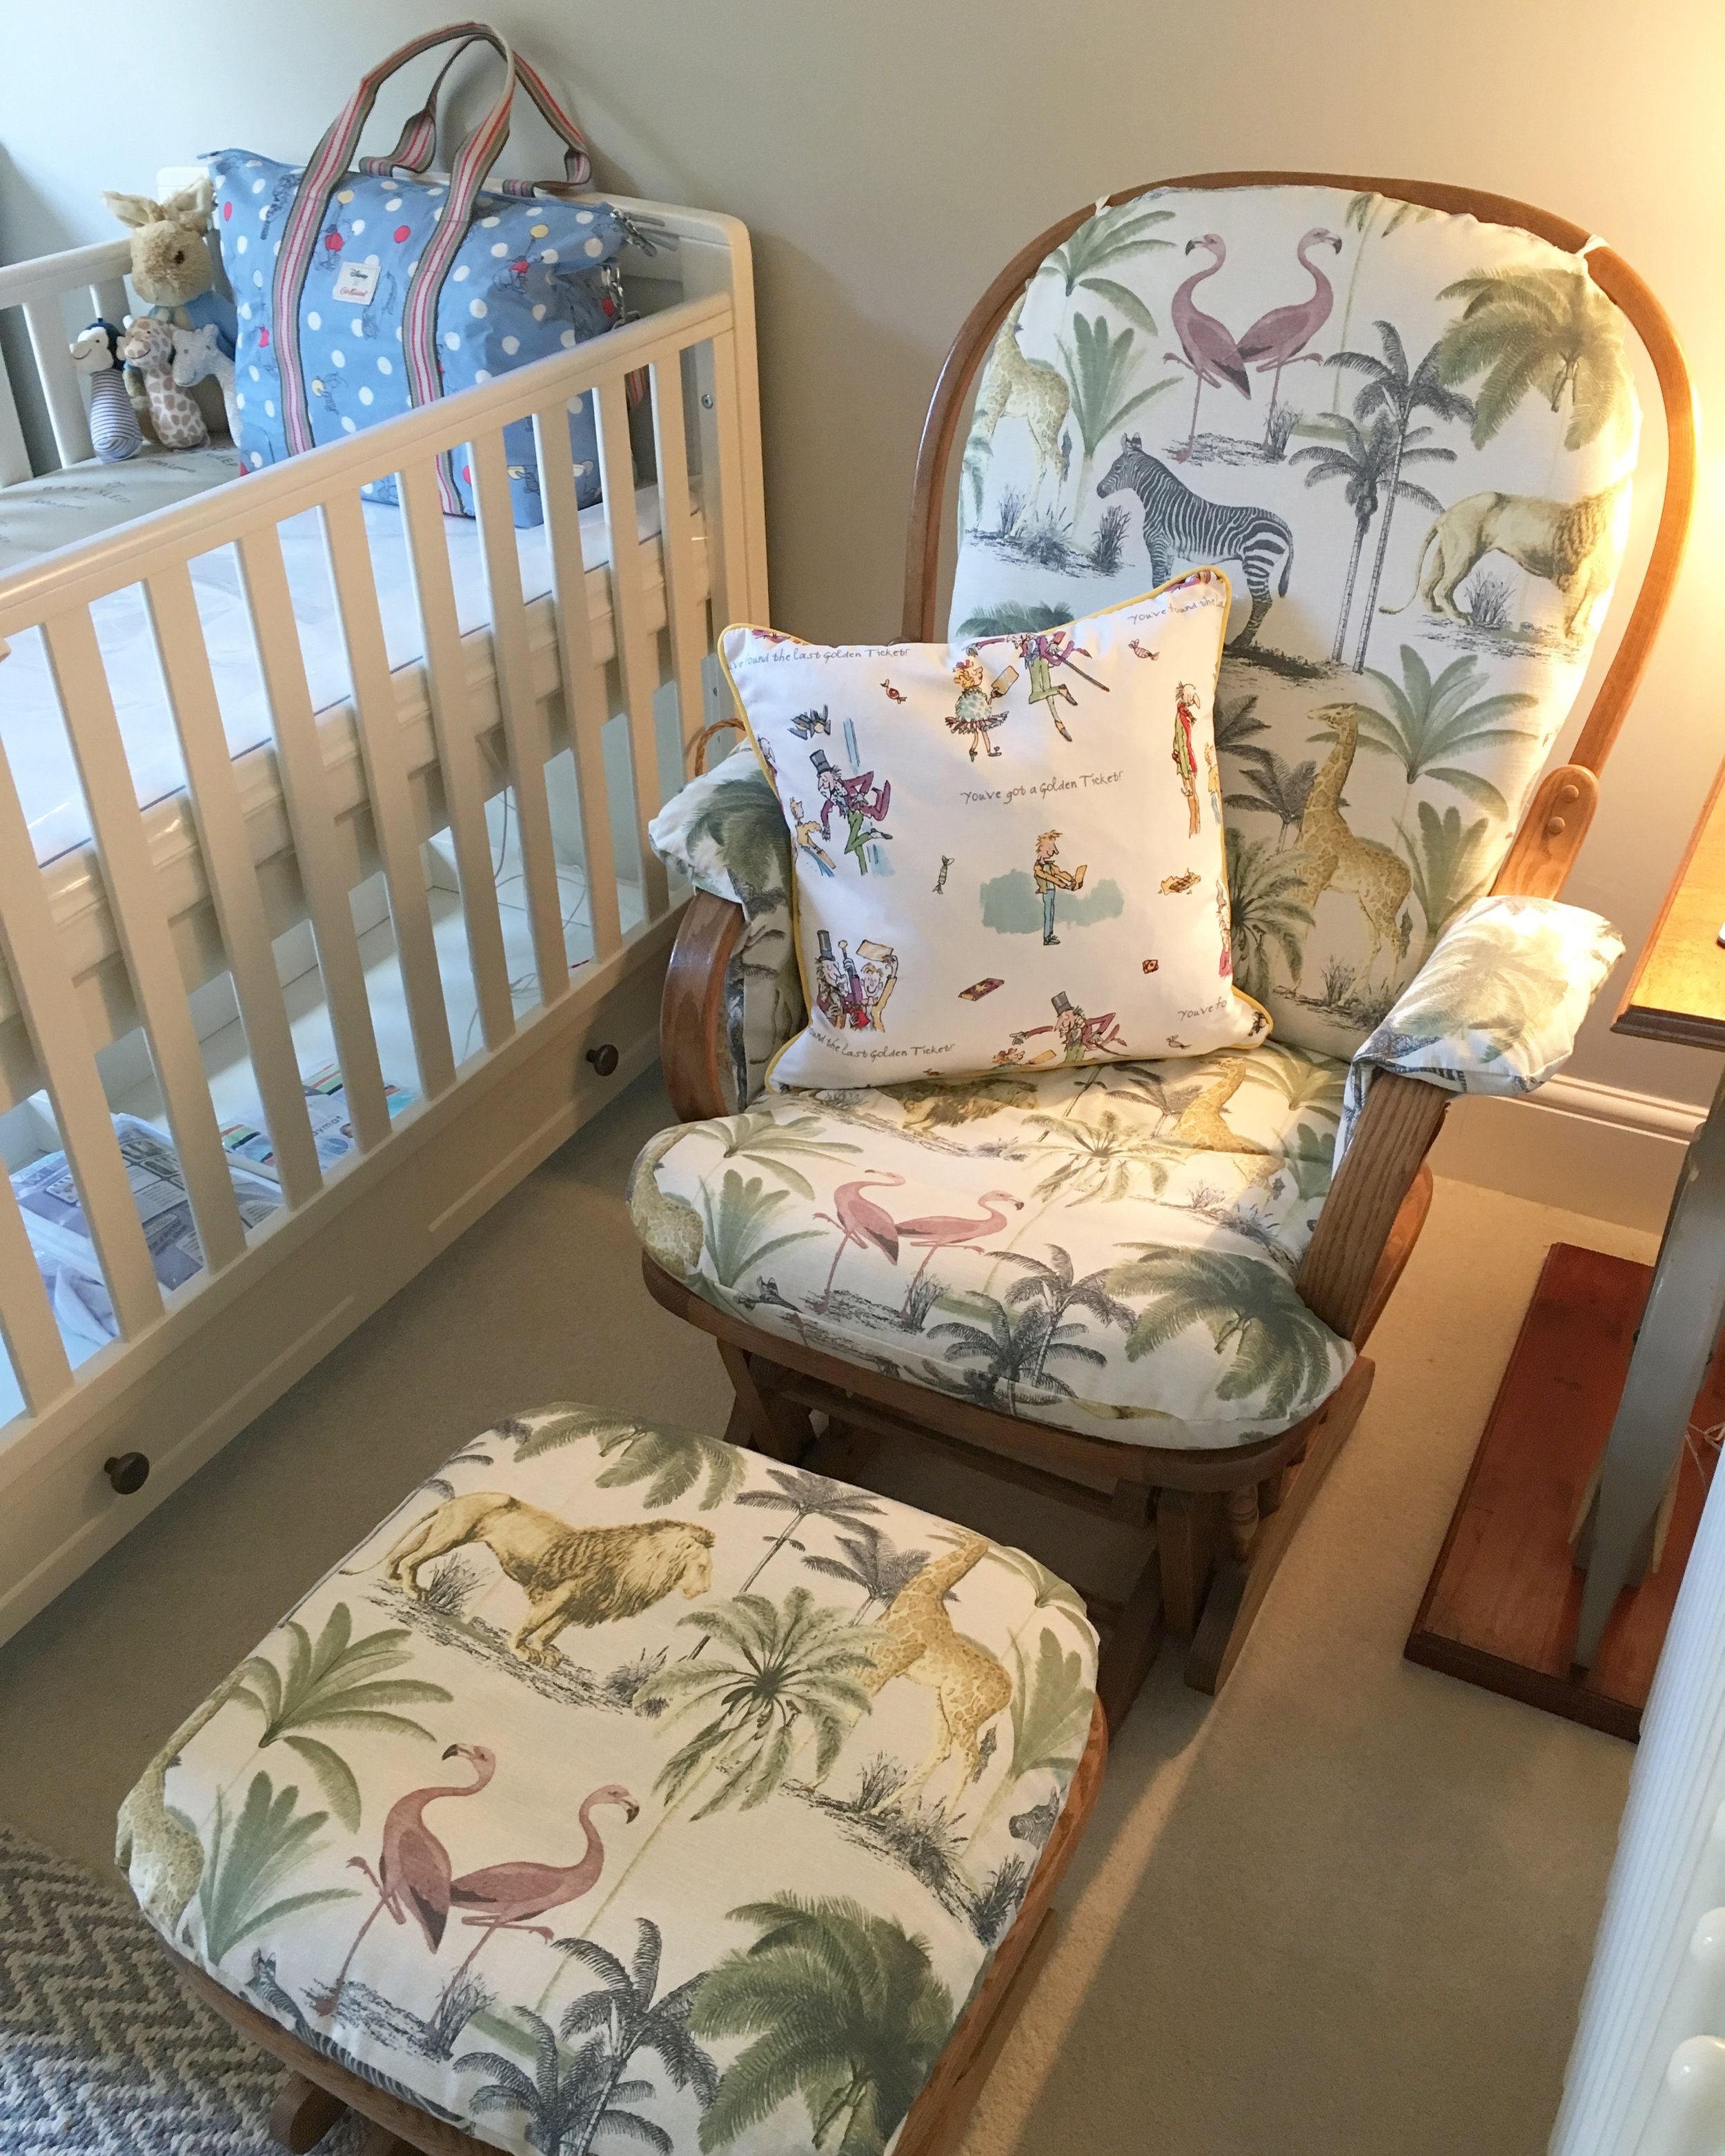
J also has some lovely soft toys including Peter Rabbit, Benjamin Bunny and a Moomin. We found HomeSense was a great place for Roald Dahl decor, where we bought J’s Charlie & The Chocolate Factory cushion. You can also buy some pretty Roald Dahl lampshades on Etsy. (If you love Roald Dahl as much as I do, take a look at my Roald Dahl decor post here.)

cushion.JPG

Bookends         

You can buy some brilliant bookends these days – ornate ones, funny ones! Here are some of my favourites:

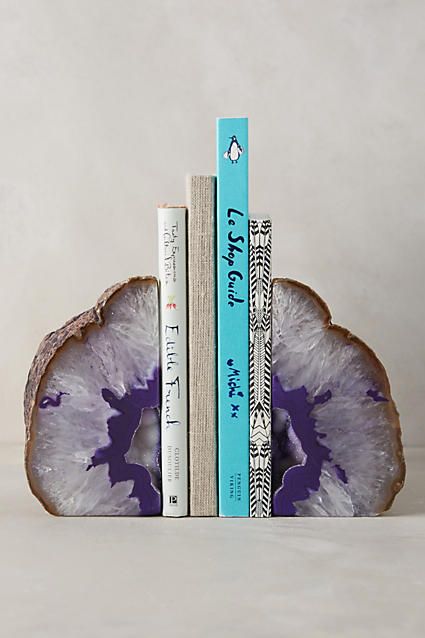
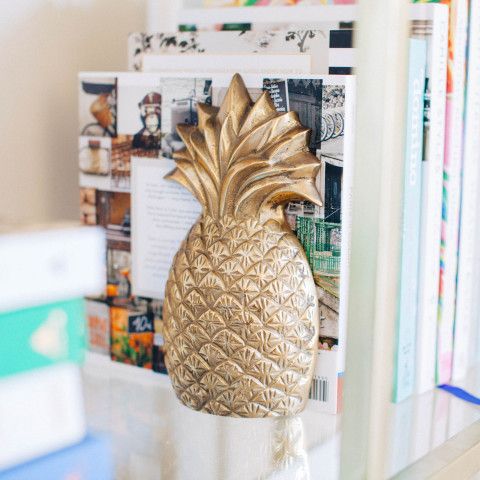
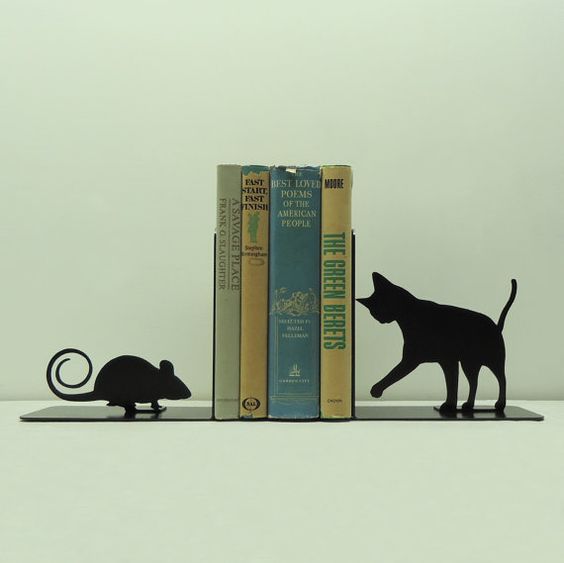
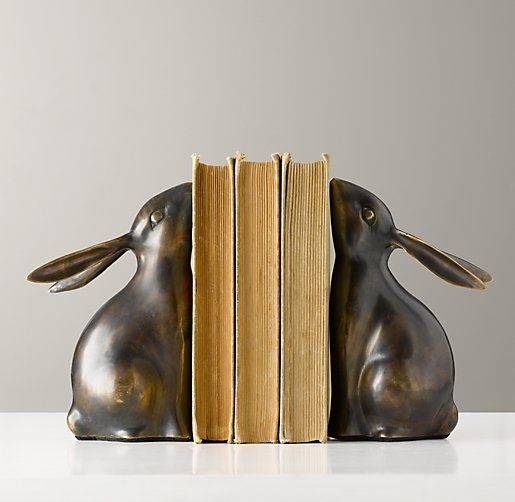
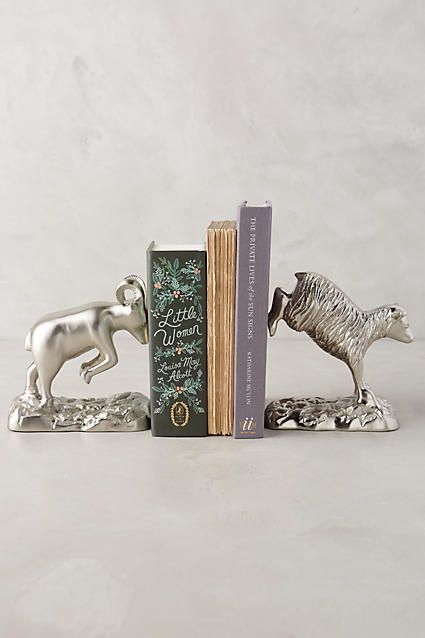
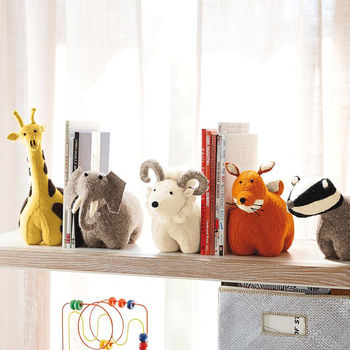
(Images via Pinterest & Not On The High Street)

Book Ledge

One of my favourite purchases for J’s room is his book ledge from the Great Little Trading Co. – we fixed it just underneath his window so he can easily pick books from it. It’s one of my favourite features in his room as it feeds his interest. 

book-ledge.JPG

Pinspiration

I love using Pinterest to find weird and wonderful ways to display books and create reading nooks in your home. Take a look at my ‘Books & Bookcases’ board here.

I hope some of these ideas have provided some literary decor inspiration! If you have any ideas to share, I'd love to hear them - please comment below or you can contact me via Instagram or Twitter.

YOU MIGHT ALSO LIKE...

DIY Corkboard

diy-corkboard.JPG

Difficulty Rating: Easy

Last year, I stumbled across this DIY wine cork pinboard. Up to this point, we'd been saving, signing and dating special fizz and wine corks that we'd shared with friends to record a happy memory e.g. new nephew, bestie's 30th, wedding fizz. This DIY was the inspiration I was looking for - simple to do and so useful! It's been on my Rainy Day Projects list for a while and it's finally complete!

Simply: 

  • Buy a cheap box picture frame (mine was from IKEA)
  • Remove the glass
  • Glue gun corks straight into it (keep them tight)

That's it!

All you need: box picture frame (glass removed), corks & a glue gun.

All you need: box picture frame (glass removed), corks & a glue gun.

Top Tips:

  • Glue the top of the corks to the base, as I found the bottom of the corks are better for putting pins in
  • With this in mind, sign the base of the corks, not the top! (Sharpies are the best for this.)
  • This project requires a lot of corks! I thought we had a fair amount but when they're glued closely together, they don't take up much room! You don't want a tiny corkboard either so build up your cork collection before beginning this project. Mama B, Papa B & Sister S helped contribute - it's nice to have some corks unsigned to avoid your corkboard looking too busy.

Take a look at another pinboard how-to here.

You might also like...

Christmas Snow Jars

Snow scene jars are everywhere on my Pinterest feed at the moment - and rightly so, as they look amazing! I think they look particularly pretty on mantelpieces and side tables, as well as an eye-catching centrepiece on your Christmas table.

The trick is to create a 'scene' inside them - similar to a snow globe but without the water...

DIFFICULTY RATING: EASY

ORIGINAL PIN:

Via

MY ATTEMPT:

SHOPPING LIST

  • Display jars (I found mine at a bargain price from Homesense)
  • Epsom salt
  • Christmas decorations / models to make a village scene:
    - My house bauble and mini trees are from Sass & Belle
    - My glitter animals are the ones I made to top my Christmas cake with last year (love a good recycle!)

HOW-TO

1. Your epsom salt is your snow! Add to the bottom of your jar/s first.

2. Add your mini village!

Crafternoon essentials: Tea & a chocolate flapjack!

Crafternoon essentials: Tea & a chocolate flapjack!

Glistens in the daylight...

Glistens in the daylight...

... And sparkles at night-time.

... And sparkles at night-time.

That's it!

TOP TIPS

  • Keep out the way of children and pets - mantelpieces high up work well. Jars with lids are also a good call
  • Add fairy lights around them for extra sparkle (you could hide the battery pack or cables with green garlands)
  • Mini woodland creatures and trees create a particularly effective snow 'scene'
  • I would make two in case you want to add them to a mantelpiece or side table - keeping the look balanced.

VERDICT

Easy, pretty, affordable to make: highly recommended!

If you love easy Christmas craft ideas, this might also be up your street.

YOU MIGHT ALSO LIKE:

Space-Themed Baby Mobile

DIFFICULTY RATING: MEDIUM

There are some lovely baby mobiles on the market, but a lot are super expensive. L suggested Mama B and I use some of my maternity leave to make Baby L's nursery mobile. I was apprehensive at first as my sewing skills leave a lot to be desired-! But Mama B sewed a lot at school and has never forgotten the essentials, plus her career was in teaching, so she taught me in a very easy-to-understand way (making the whole project much more enjoyable!).

I also found the process very therapeutic. I have one of those minds that tends to wander off during TV watching - especially with so much baby stuff flying around my head these days! Opening up my sewing kit and stitching in front of the telly really relaxed me. It was also a nice project to enjoy making with my mum - something we can give to Baby L and keep in the family.

We copied the design of this pretty version below from Etsy, which I found on Pinterest:

ORIGINAL PIN:

Via

OUR ATTEMPT:

SHOPPING LIST

  • Felt (enough for the amount you want to make - remember you need double as you're stitching two pieces together)
  • Embroidery thread (we used some in similar colours to the felt, others slightly brighter to stand out)
  • Needle
  • Polyester filling
  • Wooden skewer (it'll make sense in a minute)
  • Circular embroidery frame
  • Transparent decor crafting thread
  • Ribbon
  • Fabric glue
  • Fabric scissors
  • Pins
  • Printer / paper / card
  • Pritt stick
  • Sequins if you want to add extra sparkle.

HOW-TO

  • Start by printing out your templates, ensuring their sizing is similar. We made the moon slightly bigger as it's the centre feature. We used Google image search for our templates.
baby-mobile-templates.JPG
  • Cut out your first template and stick it to card. Cut out and you have your first template. (Make sure any sharp edges are rounded rather than pointed otherwise it proves tricky when trying to stitch.)
  • Fold over a square of felt and pin the template to it.
  • Cut around template with fabric scissors.
  • Remove template and start blanket stitching around the edge. Rather than attempting to describe this method, I'd recommend taking a look at some YouTube videos - this one was particularly helpful:

(Video tutorial via)

  • Stuff your felt with polyester filling as you finish a section. Make sure you put enough in there to pad the shape out. We used the blunt end of a wooden cooking skewer to reach the more narrow parts.
  • Once you're happy with the stuffing, close off your stitch.
  • Once all shapes are complete, sew your transparent decor crafting thread to your shapes and fix to the hoop, ensuring everything is balanced and secure. We tied ribbon around the hoop as this allowed us to sew the thread to the ribbon so it was extra secure.
  • Hang your hoop via bright ribbon.
  • And, you're done!

TOP TIPS

  • Make sure everything is fitted securely and is 100% baby-safe
  • Practice casting off, blanket stitching and finishing stitches on a spare bit of felt beforehand
  • Stuff a good amount of polyester filling to give each piece shape, but don't stuff too hard with the skewer as you can damage the stitches
  • We wrapped yellow ribbon around the hoop, which not only added extra colour but allowed us to sew the transparent thread to the hoop, making it extra secure
  • Find a hook to hang your mobile while you attach each piece, so you can see how each piece fits and balances together before securing
  • We stitched a star underneath the centre moon to fill a gap, which worked really well
  • Keep an eye on the two sections of felt you're stitching as you go, to ensure they're aligned
  • The embroidery thread we had was made up of 6 strands, so we separated it into three to make sewing easier and the stitches less bulky
  • We used fabric glue to attach the green felt to the Earth design - make sure this is completely secure
  • We added sequins to Saturn to break up the yellow and add a bit of space sparkle
  • Only sew when you have time - you can really tell when sewing has been rushed (this makes a great maternity leave, evening or weekend project)
  • Bolder colours are better for your baby's development (apparently!) so have fun with the colour scheme! High contrast black and white is also beneficial for babies' visual development, according to experts.

VERDICT

The sewing itself is really fun, especially when you get more confident. However, sewing the transparent thread to the hoop at the end is the tricky / fiddly part. Don't do this when you're in a rush - it requires time, patience and another person's set of eyes who can direct the sewer in terms of how high / low each piece falls and where on the hoop each fits.

For more nursery decor ideas, take a look at my Nursery board on Pinterest.

YOU MIGHT ALSO LIKE...

DIY Glitter Baubles

I love Christmas crafting during November as it gets me in the festive mood without going OTT too soon. When December dawns, I prefer to relax / eat / watch Christmas movies, knowing any homemade decorations and gifts are all taken care of. (My onions are already pickling! - Now's also a good time to get going on your Christmas cake or pudding if you're making one.)

Homemade glitter baubles have been brightening up my Pinterest feed in recent weeks, so I decided to give them a go. Not only because they look pretty but are super simple to make. You just need to order a few bits during the week and you've got a fun Christmas craft project you can enjoy for a couple of hours one weekend.

DIFFICULTY RATING: EASY

ORIGINAL PIN:

Via

MY ATTEMPT:

SHOPPING LIST

Colour-wise you can go for anything you like! The above list covers the colours I wanted to try: multi-coloured glitter with silver and green accents.

HOW-TO

  1. Fill up your baubles with the glitter, confetti and cut-up lametta
  2. Replace the bauble string with a pretty nylon cord bow

- And you're DONE! Here's some pics of the process:

TOP TIPS

  • Use a funnel for the glitter otherwise it gets pretty messy! Make sure the funnel fits into your bauble before filling it!
  • Make sure to split up the lametta strands before feeding them into the baubles, as they have a tendency to clump and you want that structure inside
  • Give your bauble a good shake afterwards, ensuring your finger is on the top-!
  • Check your tops are fixed properly - you don't want them coming off, spilling glitter everywhere!
  • You don't have to put them on your tree - I'm planning to hang mine from my staircase bannister amongst fairy lights. You could also pop them in a glass lantern to create a Christmas table centrepiece, or use them as additions to your Christmas wrapping as an extra gift (be careful though as they're delicate).

VERDICT

Super easy, not too costly and they look pretty professional at the end!

For more Christmas craft ideas, take a look at my Christmas Pinterest board.

YOU MIGHT ALSO LIKE...

Bonfire Night Invites

There's something about seasonal crafts that make me feel like a big kid. I guess it's because my primary school really embraced the creative side of seasonal events - from Easter bonnets to DIY Christmas crackers.

This particular Pinterest Project came from an image that stood out in my home feed as it brought back a strong sense of nostalgia: rainbow scratch art!

Difficulty rating: Easy

ORIGINAL PIN

Via

We used to colour in an entire piece of A4 paper with as many bright colours as possible, then used a waxy black crayon to completely cover it. We'd then scratch firework designs onto the black crayon, allowing the bright colours to come through.

However I do remember this craft being particularly time consuming (and I'm all about saving time!), so when I came across this in a local shop I grabbed a packet...

There's some amazing bonfire night party ideas on Pinterest (my favourites can be found here) so I decided to combine the two:

BONFIRE NIGHT INVITES

Using the rainbow scratch kit, simply scratch in your designs with party details and write on the back any finer details e.g. location, RSVP, etc. So simple, so quick and extremely nostalgic for any friends and family that remember this bonfire night craft.

MY ATTEMPT

All you need is the kit - you can purchase a number of versions on Amazon like this one. (Mine came with stencils but I didn't use them.)

You can also turn any leftover paper into dinner table place cards, if you decide to host a bonfire dinner party (which I think I might try next year...):

There you have it!

VERDICT

If you buy the kit, your invites will literally take you minutes depending on the complexity of your design and how many people you're inviting. If you're looking for a craft that'll take up a couple of hours to keep the kids busy, you can make the black rainbow paper yourself.

Lots of fun - for both kids and big kids.

What other crafts do you remember from primary school? I'd love to hear them!

YOU MIGHT ALSO LIKE...

Melted Crayon Pumpkins

You may remember last year, I had a lot of fun drilling and carving pumpkins. This year, I decided to use Pinterest again for some more pumpkinspiration and came across these melted crayon versions...

DIFFICULTY RATING: MEDIUM

ORIGINAL PIN:

Via

MY ATTEMPT:

After following the how-to, I have to say - it's not as easy as it looks! (As you can probably tell...!) In a nutshell, you glue crayons to the top of your pumpkin and put a hairdryer over them so they melt and drip down. In reality, the glue doesn't really hold the crayons in place and when you heat it up, it obviously melts the glue! I had my hairdryer on the hottest temperature on the lowest fan and it just wasn't working. I had to hold the hairdryer really close to the crayon and even when it started to melt, it was being blown everywhere! 

In the end, we (L had to give me a hand!) decided to play hardball and grabbed a kitchen blowtorch. This obviously makes the craft more dangerous and not appropriate for children, but it did one hell of a job of melting the crayons quickly and preventing too much mess-!

Initial tools - before replacing the hairdryer with a kitchen blowtorch and popping some foil on the stalk to prevent burning.

Initial tools - before replacing the hairdryer with a kitchen blowtorch and popping some foil on the stalk to prevent burning.

Soak crayons to remove paper sleeves (much easier to peel off this way!).

Soak crayons to remove paper sleeves (much easier to peel off this way!).

Place crayons on kitchen roll to dry off.

Place crayons on kitchen roll to dry off.

Snap crayons in half as you don't need a whole crayon for melting.

Snap crayons in half as you don't need a whole crayon for melting.

Add PVA glue to the top of the pumpkin.

Add PVA glue to the top of the pumpkin.

Place crayons on top. Leave the glue to set a bit if you can.

Place crayons on top. Leave the glue to set a bit if you can.

You have to laugh: This is what happened when I used a hairdryer. It went EVERYWHERE and wasn't giving the drip effect I was after.

You have to laugh: This is what happened when I used a hairdryer. It went EVERYWHERE and wasn't giving the drip effect I was after.

Attempt two: We replaced the hairdryer with a kitchen blowtorch and covered the stalk with foil to avoid burning.

Attempt two: We replaced the hairdryer with a kitchen blowtorch and covered the stalk with foil to avoid burning.

MUCH more effective! (But also more dangerous as you're dealing with a naked flame).

MUCH more effective! (But also more dangerous as you're dealing with a naked flame).

As you can see, a VERY messy craft so cover all surfaces! 

As you can see, a VERY messy craft so cover all surfaces! 

THE END RESULT:

Not the prettiest but I like this crafty look - fun, messy and a great way to jazz up plain pumpkins.

Not the prettiest but I like this crafty look - fun, messy and a great way to jazz up plain pumpkins.

Place on a coaster to avoid staining your furniture.

Place on a coaster to avoid staining your furniture.

I added mine to each side of our fireplace to balance it out.

I added mine to each side of our fireplace to balance it out.

TOP TIPS

  • Use a kitchen blowtorch. Otherwise it takes ages, isn't very effective and melted crayon gets blown everywhere
  • Definitely NOT a child-friendly craft as a result
  • I wouldn't place paper under your pumpkins are you're using a naked flame with the kitchen blowtorch. The ones in the picture were there when we were using a hairdryer
  • Cover your pumpkin stalk with some foil to avoid burning
  • Don't melt the crayons too much otherwise you start to burn the pumpkin beneath
  • Much easier when there's two of you but you have got to be SO careful when tilting the pumpkin to get the drips as you're dealing with an extremely hot open flame
  • Ghost pumpkins with oranges, reds and yellows look particularly autumnal
  • Always keep out the way of children and pets as the dried crayons can peel or break off (why I put them up high on our fireplace)
  • Don't place pumpkins directly on furniture as they can stain it (I used candle coasters underneath mine).

VERDICT

This is a pretty dangerous Pinterest project - because of our use of the kitchen blowtorch. But if you're careful and smart with the process, the end result looks really good! (Well, not exactly as it does on Pinterest but I love the colour and texture it adds to the pumpkins / your Halloween home decor.) It's definitely something a bit different to the popular carved and drilled ones you see on Pinterest these days. If I were to do it again, I'd probably buy more black and orange crayons to give them a more eerie look.

I'd say this Pinterest project was achievable but don't be fooled by how perfect they come across in your Pinterest feed. I think the messier the better.

Discover more of my favourite Halloween craft ideas via my board on Pinterest.

YOU MIGHT ALSO LIKE...

Praline Chocolate Cupcakes

Yep - another baking post! For two reasons: 1) I'm pregnant and have a very strong sweet tooth these days. 2) It's the height of Bake Off season so everyone in England is baking more, naturally! I also had to share the recipe below because it's one of the tastiest batch of cupcakes I've made (equal to my Jaffa Cake ones I'd say) - with lots of positive feedback from L and close friends.

DIFFICULTY RATING: MEDIUM

The recipe is straightforward, but as you have to make a praline and ensure the sugar doesn't burn, I've labelled it medium.

RECIPE FROM MY OLD FAITHFUL: THE HUMMINGBIRD BAKERY, HOME SWEET HOME

ORIGINAL PIN

This isn't actually a pin from Pinterest, it's a photo from my book! I couldn't locate it online - however baking generally is a Pinterest-inspired project. So many sugary treats are sprinkled across my Pinterest news feed that I immediately want to get baking. You can probably tell from my Food board consisting mostly of cakes.

MY ATTEMPT

RECIPE

1. Preheat the oven to 170°C and line the muffin tins with paper muffin cases to make the number you require.

2. First make the sponge. In a freestanding electric mixer with the paddle attachment or using a hand-held electric whisk, mix the butter, flour, sugar, cocoa powder, baking powder and salt together until they form a crumb-like consistency.

3. In a jug, mix together the milk and eggs by hand.

4. With the mixer or whisk on a slow speed, gradually pour half of the liquid into the crumb mixture and mix thoroughly until combined. Raise the speed to medium and mix until the batter is smooth and thick, with no lumps. Scrape down the sides of the bowl from time to time. Once all lumps are gone, turn the speed back down and gradually pour in the remaining liquid, continuing to mix until the batter is smooth and combined.

5. Spoon the batter into the prepared paper cases, filling them two-thirds full. Using a 50ml ice-cream scoop can make this process easier and will result in even cupcakes.

6. Bake for 20-25 minutes or until the sponge bounces back when lightly touched. Leave to cool slightly before removing from the tin and placing on a wire rack to cool completely before frosting.

7. Using the freestanding electric mixer with the paddle attachment or the hand-held electric whisk, gradually mix the icing sugar, cocoa powder and butter together on a low speed until combined and there are no large lumps of butter. Gradually add the milk while mixing on a slow speed. Increase the speed and beat the frosting until light and fluffy.

8. For the praline, line a baking tray with baking parchment and spread the chopped hazelnuts evenly in the tray. Place the sugar and water in a medium saucepan and bring to the boil. Allow the mixture to bubble for about 15 minutes until it forms a golden caramel. Do not stir while the mixture is boiling or the caramel will crystalise; just gently swirl the pan from time to time.

(Top Tip: Even though it says 15 mins above, mine started to go golden in about 5 mins and it turns very quickly, so keep an eye on it and go with your gut.)

9. Once the caramel is ready, carefully pour it over the chopped nuts, making sure all the nuts are covered. Allow this to cool and set completely. Once cold and set, break up the praline into small chunks, then use a food processor to chop up the praline into fine pieces. (This praline needs to be stored in an airtight container if not using straight away.)

10. Once the cupcakes are cool, spoon generous amounts of the frosting onto each cupcake, then gently smooth over with a palette knife, making a swirl at the top if you wish. Sprinkle each cupcake with a generous amount of praline.

11. ENJOY!

VERDICT

Seriously chocolatey. Seriously amazing.

If you prefer zesty to chocolatey, you might like these lemon cakes.

YOU MIGHT ALSO LIKE...

Autumn To-Do List

Windows are closed, candles are on, blankets are out: cosy autumn has arrived! I'm a winter baby so love this seasonal transition into colder temperatures. To ensure this vibrant season doesn't pass me by too quickly, I've put together an autumn to-do list, which I'll be working my way through in between work and baby prepping.

Pinterest, as always, is a great inspiration for autumnal activities, decor and crafts. Take a look at my Halloween and Bonfire Night boards for some quick home ideas that really make the most of these seasonal events. 

Onto my top 10 to-dos this season:

1. Make Crumbles

I love these classic British puds because they use up any fruit that's starting to turn (or if you're harvesting the last innings of your garden / allotment). It requires only a few staples - simply purchase these and you'll always have an instant pudding at hand should you need it:

  • Golden caster sugar
  • Self-raising flour
  • Butter
  • Light brown muscovado sugar

My go-to recipe is this one - although I add in whatever fruit I have at the time. For example, the photos below followed a harvesting session at our allotment. This rhubarb, plum & blackberry crumble was a real winner. I didn't bother with the port or walnut in the recipe but I'm sure they'd make nice additions.

2. Buy a Fresh Batch of Slipper Socks

Nothing better than putting your feet into a new fluffy pair after a hard day.

3. Get Creative with Pumpkins

You might remember I had a LOT of fun last year getting crafty with pumpkins - I will be doing the same this year but maybe trialling some new trends.

4. Halloween Night In

With Baby L on the way, we're planning a cosy night in with one of our favourite retro movies: Hocus Pocus! But just because we're not dressing up (and drinking!) like we usually do this time of year, it doesn't mean we can't go all out with sweets and decorations. Take a look at my Hocus Pocus-themed party ideas

5. Leafy Walks

Sitting down for long periods of time isn't the most comfortable of experiences now I'm into my third trimester. Some easy strolls around our local park are a great way to get some exercise while taking in the changing colours.

6. Make Soup

Because that's what autumn's about, right? Why not use your leftover pumpkin from any carving crafts and turn it into this (seriously tasty) warming pumpkin soup.

7. Early Bird Christmas Shopping

Two reasons here: 1) Baby L is arriving early December so I don't anticipate having much time (or energy!) that month-! 2) It helps spread out the cost of gift buying by starting some shopping now with my September salary.

This is on my stocking list this year.

This is on my stocking list this year.

8. Pumpkin Spice Latte

The only time I really go to Starbucks is during the autumn and winter for their seasonal coffees. This one's my particular favourite.

9. Dog Shopping

Is it me or are there suddenly loads more dog walkers about? Ok - so I walk home via a park so that's a given, but there's definitely more of them, I swear! Maybe it's because everyone's back from summer holidays and into the swing of their routines again? Either way, L and I have been enjoying seeing dogs of all shapes and sizes (from a pack of dachshunds to his & hers dalmatians!) as they enjoy their walks in this new brisk air. So much so, we're considering a canine addition to Maison Bailey. We've decided to see how baby goes first-! But that doesn't mean we can't start window shopping... we're currently loving cocker spaniels.

Via

10. Couple Time

Any parent friends/family all tell us to treasure this time just the two of us. Your world changes when you suddenly have a new addition to consider. We're so excited but completely get their point. Which is why we've booked an early shopping Christmas trip away to Guildford in October, followed by spa treatments. I absolutely can't WAIT.

Via

Do you have any autumnal traditions? Or crafts you're planning to try this year? I'd love to hear about them in the comments below!

YOU MIGHT ALSO LIKE...

Jaffa Cake Cupcakes

I know what you're thinking - another baking post. But since getting pregnant, my sugar cravings have gone through the roof! While I'm trying to maintain a balanced, healthy diet - I still find myself researching fun cupcake recipes and giving them a whirl at the weekend. Plus, since the arrival of my kMix, baking has got a lot easier (and the results much better!).

Sister S (the baker of the family), Mama B and L actually said these were the best things I've ever baked. I strongly recommend giving them a go - especially if you're partial to a jaffa cake or three...

DIFFICULTY RATING: MEDIUM

It's a pretty easy recipe, but I did have a kMix to create the cupcake mixture and frosting. Without it, I would probably have got arm ache so I'm listing this as medium.

RECIpe FROM: THE HUMMINGBIRD BAKERY, HOME SWEET HOME

This is the first recipe in the book - and for good reason. Unfortunately I can't link to the official recipe online so have typed up below. Here we go!

ORIGINAL PIN

MY ATTEMPT

RECIPe

1. Preheat the oven to 170°C and line the muffin tins with paper muffin cases to make the number you require.

2. First make the sponge. In a freestanding electric mixer with the paddle attachment or using a hand-held electric whisk, mix the butter, flour, sugar, baking powder and salt together until they form a crumb-like consistency. 

3. In a jug, mix together the milk, eggs and vanilla extract by hand.

4. With the mixer or whisk on a slow speed, gradually poor half the liquid into the flour and butter and mix thoroughly until combined. Turn up the speed and beat until the batter is smooth and thick with no lumps. Scrape down the sides of the bowl as you go along. Once any lumps are gone, turn the speed back down and gradually pour in the rest of the liquid, continuing to mix until smooth and combined.

5. Spoon the batter into the prepared paper cases, filling them two-thirds full. Using a 50ml ice-cream scoop can make this process easier and will result in even cupcakes.

6. Bake for 20-25 minutes or until the cupcakes are golden brown and the sponge bounces back when lightly touched. Leave to cool slightly before removing from the tins and placing on a wire rack to cool completely before frosting.

7. Using a freestanding electric mixer with the paddle attachment or a hand-held electric whisk, gradually mix the icing sugar, cocoa powder and butter together on a low speed until combined and there are no large lumps of butter. Gradually add the milk while mixing on a slow speed. Once incorporated, increase the speed and beat until light and fluffy.

8. Once the cupcakes are cool, use a sharp knife to make a hollow in the centre of each cupcake, approximately 2cm in diameter and about 3cm deep. Retain the cut-out piece of sponge. Spoon about 1-2 teaspoons of orange marmalade into the hollow. Replace the cut-out piece of sponge, trimming to fit and pressing down gently to ensure that the top is level with the rest of the cake.

9. Spoon a generous amount of the frosting onto each cupcake, then gently smooth over with a palette knife, making a swirl at the top if you wish. Top each cupcake with a mini Jaffa Cake (I only had normal-size ones so cut these in half).

10. ENJOY!

VERDICT

Amazing. Try it.

For more recipes like this one, you can buy the Hummingbird Bakery book here.

YOU MIGHT ALSO LIKE...

Baby Gender Reveal Cakes

A popular trend at the moment is baby gender reveal parties, where parents-to-be ask the person doing their scan to write the baby's gender down and pop it into an envelope. They then give the envelope (without looking in it) to a baker, who makes a cake covered in white icing. Inside is either blue or pink icing/sponge to represent the gender of their expected arrival. Parents invite loved ones over for a party, where they cut the cake and all find out together. Just like this:

I think this is a lovely idea - but for our first, L and I wanted to keep it a bit more personal and find out on our own (together) during the scan. We do have a plan to reveal our baby's gender this week though (keep an eye on Instagram!) - but to make the run-up fun, I decided to keep with the cake theme and bake some blue and pink cakes this past weekend.

We love lemon cakes so followed this recipe. Here's how it went...

DIFFICULTY RATING: EASY

ORIGINAL PIN


MY ATTEMPT (WITH BLUE & PINK ICING!)

I am most definitely not one for finesse when it comes to decorating (as you can see!). But these tasted AMAZING (which is the main thing, right?).

VERDICT

Really easy recipe - and more shareable than a whole lemon drizzle cake. 

TOP TIPS

  • As per the recipe, don't over-mix before popping in the oven.
  • Also, don't overcook them - follow the recipe but keep an eye on them.
  • A 'cake tester' is not only handy for checking your cakes are cooked through, but you can use it to prick holes into your cakes to drizzle your lemon mixture into afterwards.
  • Use red food colouring sparingly to create PINK icing!
  • Bake on the day of your gender reveal! (Or the day before - still equally tasty).
  • Keep some spare for the grandparents, aunts and uncles-to-be.
  • You can also use them to announce on FaceTime to family and friends e.g. a plate with a pink and blue cake on, then the father-to-be feeds mama the appropriate colour. (Plus the mama gets cake - everyone wins.)

Discover more cake-spiration on my Pinterest Food board.

YOU MIGHT ALSO LIKE...

Rainy Day Projects

It's set to be the wettest June on record - with Wimbledon and Glastonbury predicted to be a wash out. Er, summer - what are you playing at?! We're supposed to be returning from work and spending evenings in our gardens or in a beer garden, not shivering under blankets and putting candles on to brighten things up.

Does anyone remember 'wet play' at school? Rain outside = fun projects indoors, usually crafty? I've tracked down 5 of my favourite recently discovered Pinterest projects which are on my to-try list. That's right weather - I may not be able to lounge in the sunshine with a hot dog but, by heck, will I have some beautiful house projects delivered by the end of it.

1. Cork Pinboard

For some reason, I can't throw away corks that mark special occasions. This is a great use for them.

via

*Update August 2017: I tried this DIY project and it went really well! Loved the result. See the full how-to here.

2. Firework art

Does anyone remember making these in school? It wouldn't be a wet play project list without some nostalgia. Great idea for a bonfire night invite.

via

3. Cat scratchpole tower

An IKEA hack your cats will thank you for.

via

4. Watermelon Cupcakes

Cooler indoors = pop the oven on! If I can't eat a watermelon outdoors - I'm bringing them indoors. With sugar.

via

5. Christmas Planning

I know, it's super early. But when summer's not performing as it should, I can't help but think ahead to Christmas. Pinterest is my go-to place for festive decor ideas, recipes, plus some really brilliant gift wrapping suggestions. If all you want to do on a rainy day is sit on the sofa, spark up your laptop or get the Pinterest app and start planning all your Christmassy projects.

You can find my favourite pins on my Christmas board:

If you've tried any home projects recently that would be perfect for a rainy day, I'd love to hear about them! Let me know on Twitter or in the comments below.

YOU MIGHT ALSO LIKE:

White Chocolate Popcorn with Sprinkles

DIFFICULTY RATING: EASY

This Pinterest project comes from one of my favourite blogs, whose food contributor Gaby shared this simple recipe for those who love fun food. (I pinned it immediately to my Food board!) Rather than traditional popcorn, simply mix it with melted white chocolate, sprinkles and some sea salt flakes, leave to cool and you have one seriously tasty movie snack.

ORIGINAL PIN

via

MY ATTEMPT

So simple to make...

VERDICT

This has to be the easiest and most successful Pinterest Project to date. It took less than 10 minutes (excluding chill time) and is a great way to add some pizzazz to your next movie night in. (If you're in a rush, pop it in the fridge to cool down quicker.) It tastes amazing.

For another fun recipe with sprinkles, try out these unicorn biscuits.

YOU MIGHT ALSO LIKE...

Gummy Bear Ice Lollies

gummy-bear-ice-lollies.JPG

DIFFICULTY RATING: EASY

I love this Pinterest project as it's so quick and easy, plus it ensures you always have a stash of refreshing ice lollies in the freezer that don't cost a packet.

All you need is: 

  • Sprite
  • Gummy bears
  • Ice lolly mould

The recipe is so simple: fill moulds 3/4 full of Sprite, drop in your gummy bears, then freeze! Done! (Original recipe here.)

ORIGINAL PIN

MY ATTEMPT

TOP TIPS

  • Lakeland do the best ice lolly moulds (here) - I purchased them after accidentally buying mini ones on Amazon-!
  • If you have an old-style sweet shop near you, that's the easiest way to find the amount of gummy bears you need without having to buy packets of assorted Haribo. Or you can go online - Amazon offer big tubs. Saying that, having other Haribo sweets leftover gave me the idea to create other versions, so I had some fun creating gummy rings, fried eggs and heart versions.
  • This is a great way to use up a leftover big bottle of Sprite - if you think it's going to go flat.

For more fun food ideas, take a look at my Food board on Pinterest.

YOU MIGHT ALSO LIKE...

Unicorn Biscuits

Difficulty Rating: Medium

You might have noticed, but the world has fallen in love with unicorns. From sprinkle shakers to onesies, they're everywhere. Unicorn biscuits / cookies have been popping up on my Pinterest feed for a few years now - so I decided to give them a go.

Rather than find a recipe, I decided to go with my favourite childhood biscuit recipe: iced spice biscuits - taken from a childhood cookbook that sister S and I used to cook from with Mama B in the late 80s / early 90s. I'm no baker, especially not on the same level as Pinterest bakers, so I decided to have some fun, get creative and not worry too much about it being perfect. After all, what's the point of cooking a childhood recipe if the results aren't a bit rough around the edges? 

ORIGINAL PIN

MY ATTEMPT

Recipe from our childhood cookbook.

Recipe from our childhood cookbook.

THE VERDICT

Unicorn legs / horns are VERY fiddly! I had to rebuild most of the legs, hence their slightly wonky appearance! I can see why some opt for baking only the heads.

Have fun with them - it's all about being a big kid. Find a nostalgic recipe, stock up on hundreds and thousands and off you go!

For more fun baking ideas, take a look at my Pinterest food board.

YOU MIGHT ALSO LIKE...

Easter Egg Wreath

DIFFICULTY RATING: EASY (BUT MESSY!)

DIY Easter wreaths are everywhere on Pinterest at the moment - especially these crafty ones. They're really fun to make - dipping embroidery thread in a mixture of spray starch and PVA glue before wrapping around blown-up water balloons to make egg 'nests'. Once dry, you pop the balloons and you've got yourself some eggs ready to glue-gun together into a wreath. It's that simple!

ORIGINAL PIN

MY ATTEMPT

- A mini version (for those who are short on time!). 

Scroll down for my Top Tips...

Apply some olive oil to your water balloon before wrapping glue-dipped thread to make balloon removal easier once popped.

Apply some olive oil to your water balloon before wrapping glue-dipped thread to make balloon removal easier once popped.

Mix PVA glue with spray starch, then dip thread into the mixture until fully coated.

Mix PVA glue with spray starch, then dip thread into the mixture until fully coated.

Peg balloons to a makeshift washing line to dry.

Peg balloons to a makeshift washing line to dry.

Once fully dry, pop the balloons!

Once fully dry, pop the balloons!

Lay out your balloons into a wreath shape before glue-gunning together.

Lay out your balloons into a wreath shape before glue-gunning together.

This is a really messy craft so make sure to put a protective surface down (I opted for old oilcloth).

This is a really messy craft so make sure to put a protective surface down (I opted for old oilcloth).

TOP TIPS

  • This is ideally a two-person craft. Mama B and I held a prosecco crafternoon on Mother's Day, with one dipping the thread and the other wrapping it around the balloons with glue-free fingers (much easier).
  • There's lots of tutorials out there - we took inspiration from a couple but ended up adding our own twist e.g. Mama B's idea to add olive oil to the balloons before the thread was applied to make the balloons easier to remove once popped.
  • While this is really fun and looks pretty, it's also very delicate and probably won't stand the test of time or store well until next Easter.
  • It looks great on windows, mirrors and walls (why not replace a picture frame for a few weeks?).
  • Make sure you give yourself a week to gather supplies / order online: embroidery thread (pastel colours are perfect for Easter), spray starch, PVA glue, a glue gun and water balloons.
  • For weekend crafters, wrap balloons on a Saturday, allow to dry overnight, then assemble Sunday. 
  • Wrap lots of thread around each balloon, to ensure you get the egg shape. It needs a strong structure to hold its own within the wreath.
  • Cut a number of threads ready to dip in the PVA/spray starch mix, it's not easy doing this with gluey fingers!
  • Think about the ribbon or string you want to use to hang it - a big bright yellow bow, some rustic garden string or raffia will look great.
  • Once dipped, get your thread onto the balloon as quickly as possible - it dries fast.
  • While a mini version is quick and fun, a bigger one with two layers (as featured in the original pin) will help give it stronger structure (depends how much time and thread you have!).

Visit my Easter Pinterest board for more crafty ideas and recipes.

Easter Cupcakes

DIFFICULTY RATING: MEDIUM

There's something about Easter that makes me want to bake - I think it's the luxury of two extra days off work, mixed with the fact you know the vast majority of people are also embracing their sweet tooth (so calories don't count).

I discovered this vanilla & coconut recipe on one of my favourite lifestyle blogs three years ago and pinned it to my Easter Board to remind me to try it. It originates from Martha Stewart and is a great option for those who fancy a change from pure chocolate (!).

[Here's the recipe]

And here's how I got on... 

ORIGINAL PIN

MY ATTEMPT

For someone who doesn't bake as much as people think she does (sister S is the family's star baker), I'm pretty proud of this attempt!

Scroll down for more snaps from the bake and my Top Tips...

cupcake-mix.JPG

TOP TIPS

  • The recipe is for 40 cupcakes. Make sure to reduce your quantities if you want to make less
  • I hate having to convert American 'cups' into English grams/ounces so decided to purchase these. MUCH easier!
  • Make sure your butter is at room temperature - really difficult to whip otherwise
  • Add a bit of bling with these

Love Easter? You'll love these DIY bunny jars.

YOU MIGHT ALSO LIKE...

Wrapping Paper Storage

DIFFICULTY RATING: EASY

I love discovering smart decor hacks on Pinterest. I really admire anyone who can take a product and find another use for it (and in some cases, a better use for it!).

Wrapping paper storage is one of the product hacks that has really taken off in recent years. Once relegated to a dark desk drawer, rolls are now having their moment in the spotlight - with homeowners organising and displaying them in ways that make them more accessible, while adding pops of colour to a room.

I decided to use a cream enamel 'long tom' flower pot as my storage solution (I bought mine from a local garden centre but you can find a version here), as there was a perfect corner for it in my home office:

WRAPPING STATION ESSENTIALS:

  • Wrapping paper
  • Ribbons / string / raffia
  • Gift tags
  • Scissors
  • Sellotape / Scotch tape (I love this)
  • Elastic bands (to stop rolls unravelling)
  • Flat surface, clear of clutter
  • Jiffy bags / packaging tape if posting
  • Gift box of cards (mixture of occasions / blank)
  • Gift bags of varying sizes (for those awkward-shaped gifts)
  • If you have a spare wall, I'd definitely recommend investing in this.

MORE WRAPPING PAPER STORAGE IDEAS:

For more home office ideas, take a look at my Pinterest board.

YOU MIGHT ALSO LIKE...

Plant Pot Makeover

decoupaged-plant-pots.JPG

DIFFICULTY RATING: MEDIUM

Flower pot makeovers have been everywhere on Pinterest in recent months. From painting to decoupage, a quick craft can turn plain terracotta pots into fun additions to your home. Bright and bold or chic and subtle - simply choose the paint or napkin you love the most and get crafting.

This pin from Place of My Taste particularly inspired me as I love the choice of napkin:

The plan during this Pinterest project was to decoupage all six flower pots, which began with painting them to give a base colour. However I loved the painted ones so much, I decided to opt for half and half. Here's how I got on:

WHAT YOU NEED:

  • Terracotta pots (I went for six of varying sizes)
  • Chalk paint
  • Paint brush
  • PVA glue
  • Scissors
  • Napkins (couple of design options)
  • FrogTape (you can use masking tape but I find FrogTape better for keeping paint out)

Painted pots

If dirty, wash your pots and let them dry out fully. (I did this a few days beforehand.)

If dirty, wash your pots and let them dry out fully. (I did this a few days beforehand.)

Chalk paint your pots (no prep required). I used FrogTape on the areas I wanted to remain terracotta.

Chalk paint your pots (no prep required). I used FrogTape on the areas I wanted to remain terracotta.

Once dry, peel away FrogTape.

Once dry, peel away FrogTape.

I love this colour combination (I used Annie Sloan chalk paint in Louis Blue).

I love this colour combination (I used Annie Sloan chalk paint in Louis Blue).

Final result! I couldn't wash off all the outdoor markings from the terracotta but I think this keeps them looking authentic.

Final result! I couldn't wash off all the outdoor markings from the terracotta but I think this keeps them looking authentic.

On to the decoupage...

I then rounded up a selection of napkins ready to decoupage my remaining pots.

I then rounded up a selection of napkins ready to decoupage my remaining pots.

You can decoupage the whole napkin or cut out specific designs.

You can decoupage the whole napkin or cut out specific designs.

I decoupaged onto chalk painted pots as the lighter background worked better.

I decoupaged onto chalk painted pots as the lighter background worked better.

Alternatively you can use the whole napkin design (I still cut these into smaller squares to help with application).

Alternatively you can use the whole napkin design (I still cut these into smaller squares to help with application).

The final result!

The final result!

TOP TIPS

  • I've never decoupaged before so when looking up the technique, some crafters suggested adding glue to the pot first, others advised adding to the napkin beforehand. I chose the first option as I found when applying to the napkin first, it would stick to my fingers and tear-!
  • Don't do this slippery craft over hard flooring (especially if it's slate). I almost learned this lesson the hard way.
  • Grab a couple of napkin designs in case you don't like how the first one comes out. 
  • Chalk paint makes life easier. No prep - just paint.
  • My pink rose napkins are from Amazon, the fish and smaller flowers are from Cath Kidston (I always pick up a few packs when there's a sale on).
  • Keep them inside - outdoor weather will ruin them. On that note...

IDEAS FOR INDOOR USE:

  • Indoor plants (of course!)
  • Pen pot
  • Makeup brushes
  • Essential cables and chargers
  • Bar essentials e.g. bottle opener, champagne stopper, cocktail mixing spoon
  • If you have a table or shelf by your front door, use a smaller pot for grab-and-go essentials such as wallet, keys, sunglasses, gum, etc.

The verdict

The decoupage project was quite time consuming but I was happy with the end result. I'd recommend giving it a go if you have some spare time one weekend. What I really liked discovering from this project was how much I LOVE chalk paint. It's the ideal upcycling solution for people who are limited on time. I'm also keen to try this pot project, as it looks equally quick and effective.

For more Pinterest project ideas, take a look at my home decor boards here.

you might also like...

Kitchen Booth

DIFFICULTY RATING: MEDIUM

One of my favourite Pinterest finds during our refurb was the idea to add an L-shape kitchen booth to maximise seating space. We hired a carpenter to create the structure, with the seats lifting upwards to reveal extra storage (really useful for cat litter, kitchen roll, spare tins, cans, etc).

We handled the painting to save money, then hired a professional upholsterer to create the bespoke seating cushions (I would have loved to have made them myself but my skills aren't up to scratch just yet-!). I opted for neutral stripe fabric, adding colour with statement cushions.

PINTEREST BOOTH INSPIRATION:

The 'medium' rating for this project is down to the amount of stages involved. However if you organise a carpenter and upholsterer, the most time you'll personally spend will be on painting and selecting your fabric and cushions. While it's not the cheapest project, it is replacing a number of chairs so it's a similar investment. It also adds subtle storage, which chairs don't offer. We're planning to add a circular bistro table as it won't take up too much floor space (plus we have our dining room/table for larger events).

Fancy more kitchen inspiration? Find out how to get Meryl Streep's kitchen look from the movie, 'It's Complicated'.